Introduction
In this article, we’ll look at how to create a Sticky Scrolling effect. The free Gutenberg Sticky Block plugin allows you to fix any Gutenberg block to the top of the page as you scroll. In addition, you can also choose when to unstick the sticky block. This effect can be used on WooCommerce or normal blog sites, and no CSS or JavaScript is needed.

The Sticky Scrolling effect can be created by using both:
The Gutenberg Sticky Block plugin can be added to any Post or Page and will be sticky as soon as you scroll down and the block hits the top of the page. The Sticky Block can contain any other blocks (Paragraphs, Images, etc.), and can also be used within other blocks (e.g. Column or Table).
Sticky Scrolling effect video tutorial
Looking At the Structure
Sticky Blocks work best when you’re using column blocks. When you’re using several columns at once, one of those can remain sticky while the other columns move up and down. For example, when scrolling, if only the left-hand column is sticky then the left side of the page will be fixed, while the right-hand column will move as normal.
If you didn’t use any columns, then the different parts of the page may overlap and the resulting layout would look messy.
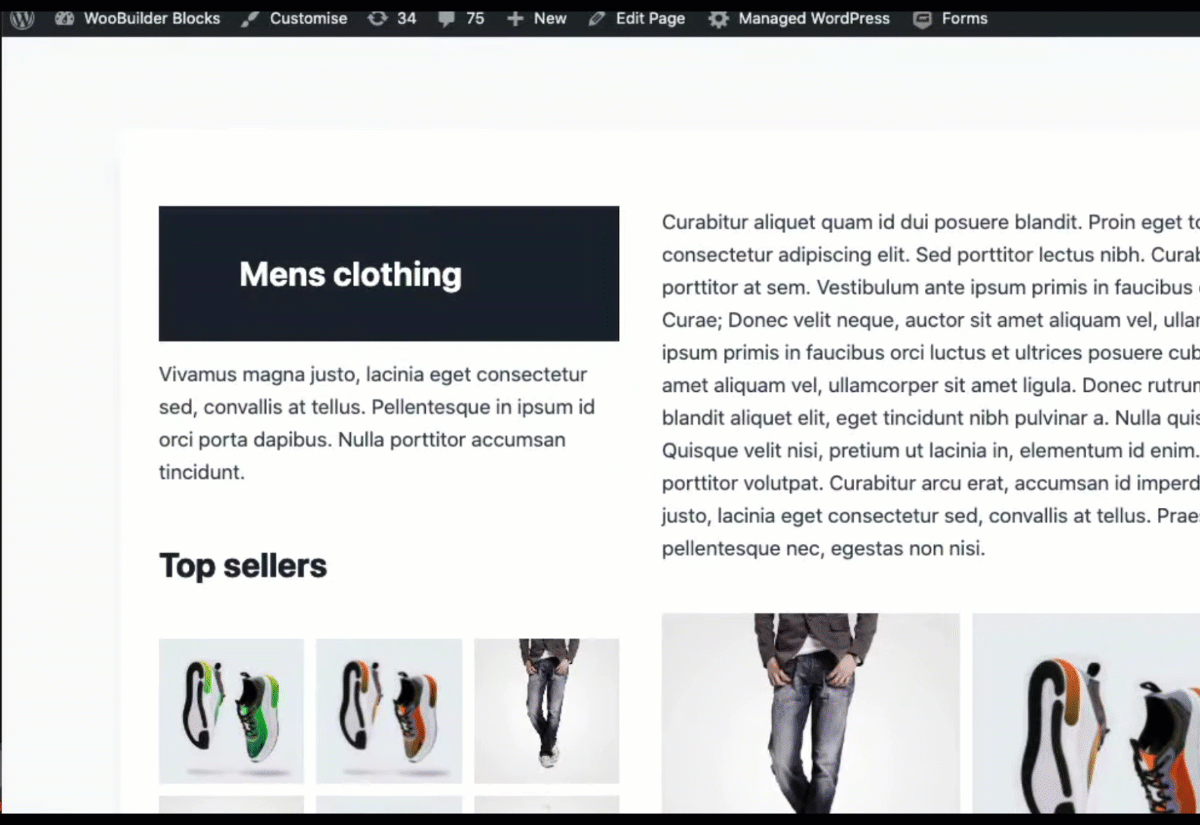
Columns are especially good to use on a Customised WooComerce Category Page, where you may have traditionally used a sidebar. A problem with the sidebar is that if someone had resized the window, or was viewing it on a mobile phone, then it would flip the content to the bottom of the page. However, using Sticky Blocks means that the block will go to the top of the page instead (this is especially useful if the block content is important to the page, as it can be seen more easily).
Where Best To Use the Sticky Block
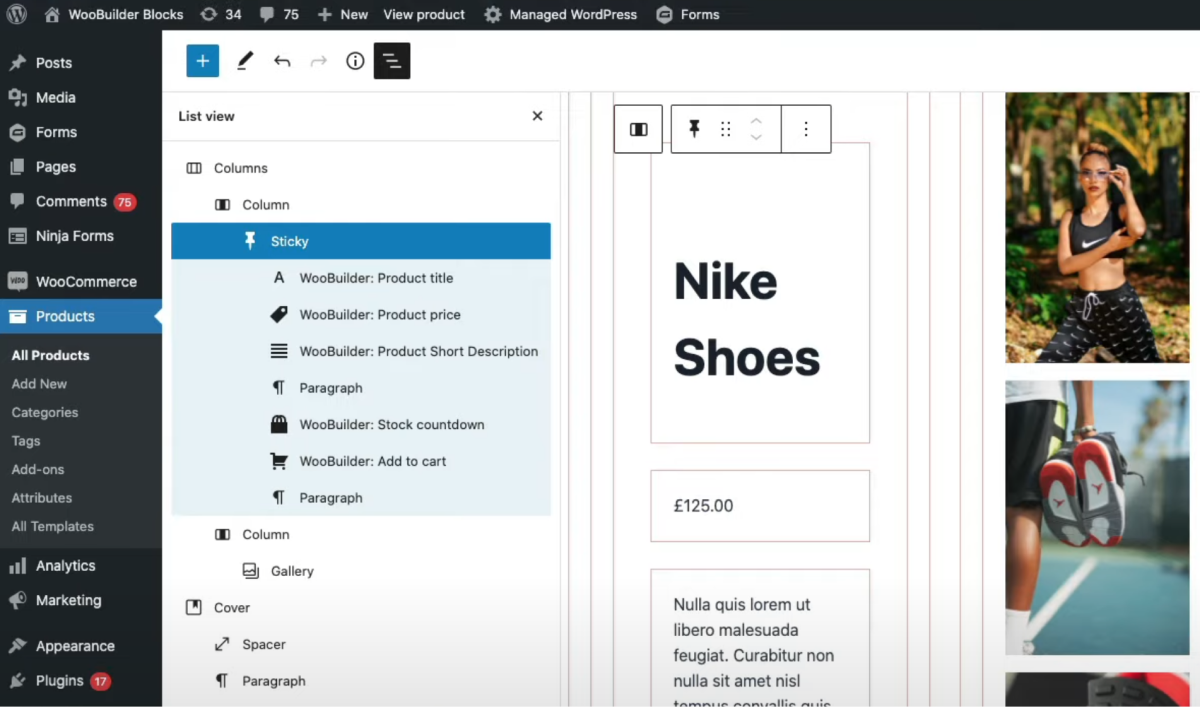
In the following screenshot, a two-column layout was created, using the Block Outline plugin. It shows you how the layout is built and allows you to see the structure more clearly. Using the list view, you see all of the blocks on your page.
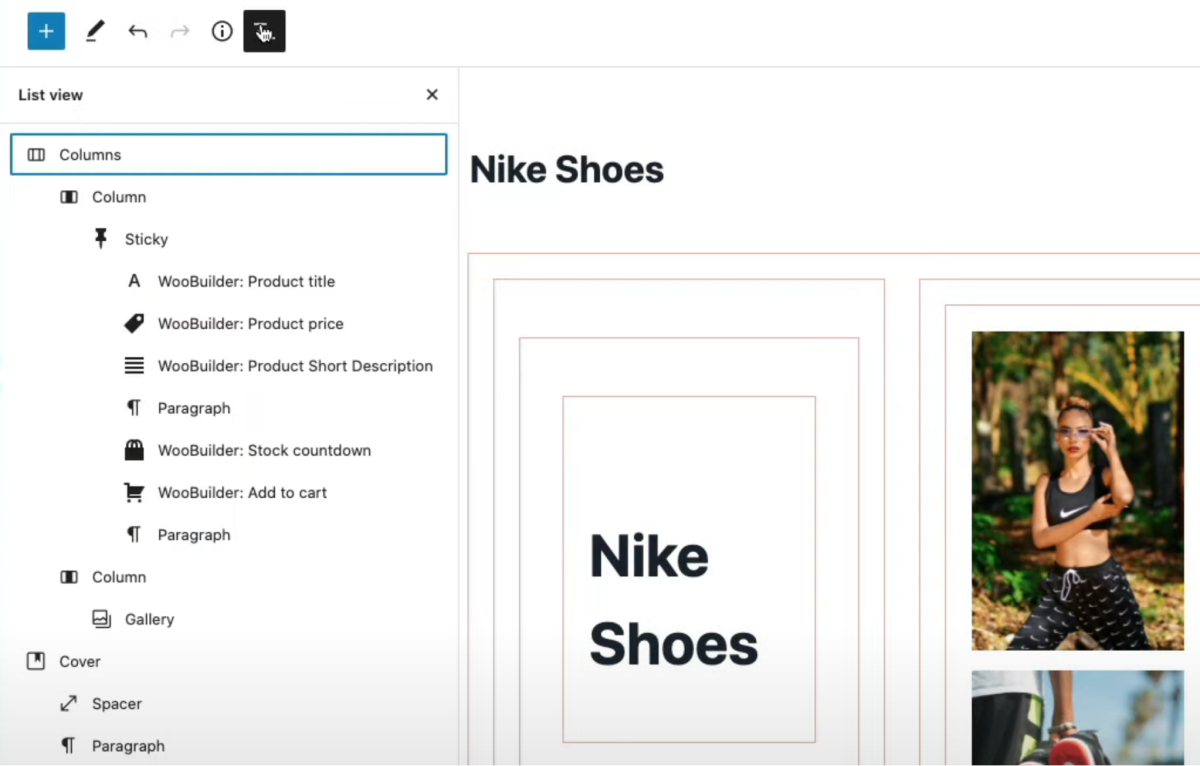
As you can see in the example list view, there is a Sticky Block within the first Column. The Sticky Block is a Container block, which means you can put other blocks within it and make them all stick together.
There are other blocks used in the first column, such as:
- WooBuilder: Product title
- WooBuilder: Stock countdown
- WooBuilder: Add to cart
- Paragraph
The WooBuilder Blocks plugin above lets you customise the WooCommerce product page through a separate plugin. Now, the second Column only contains a Gallery of photos, and there is also a Cover block included in the list view.
Sticky Block Plugin Settings
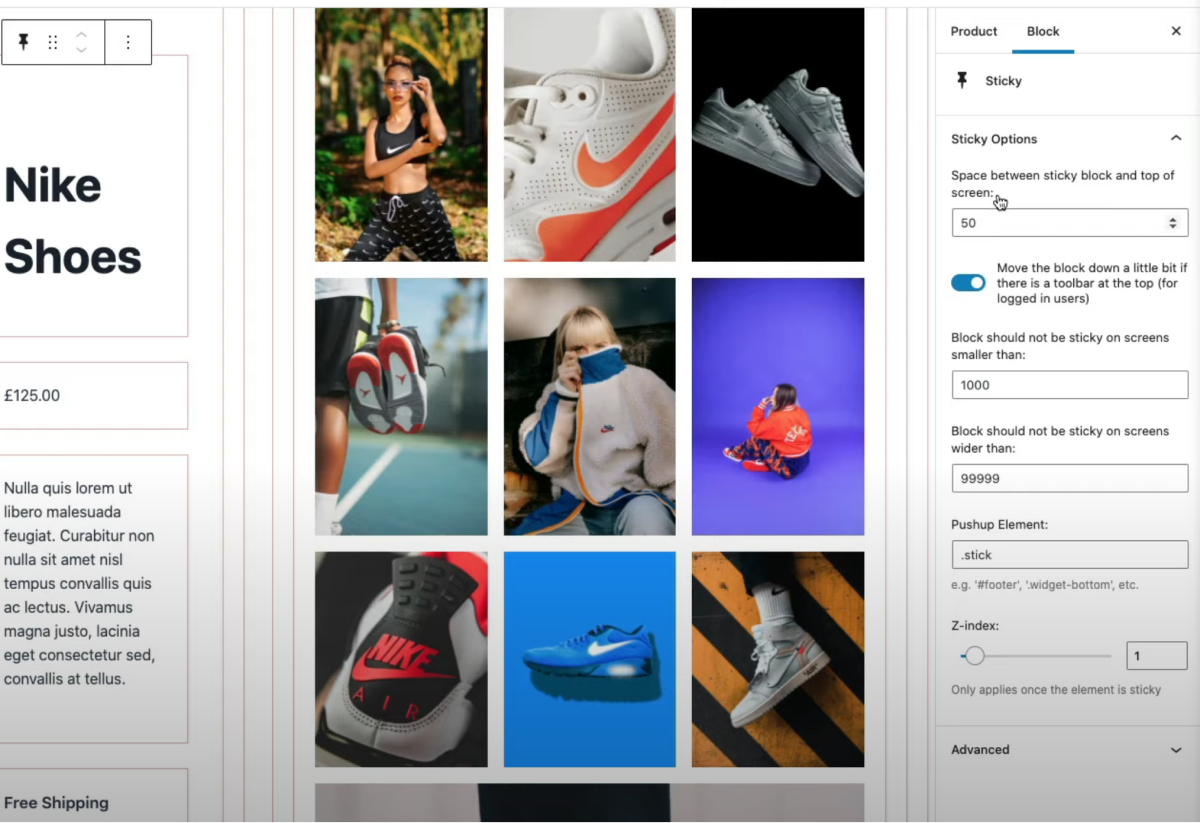
If you select the Sticky Block, you can access the block settings on the right-hand side of the page. The settings panel gives you different options to customise the block layout.
- The option ‘Space Between The Sticky Block And Top Of The Screen’ means you can have some margin between the top of the screen, and when the block starts to stick. Otherwise, it will just stick to the top.
- ‘Move The Block Down If There Is A Toolbar’ option allows you to still see the block when you’re testing things out, as you’re logged in.
- The ‘Block Should Not Be Sticky On Screens Smaller Than…’ setting means that on smaller screens, such as mobile phones, the block will become fixed on the page
- ‘Block Should Not Be Sticky On Screens Wider Than…’ can also automatically fix the block
- ‘Pushup Element’ means that when you scroll down to a certain point, the block will unstick itself and move naturally on the page again. This prevents the sections from overlapping with each other
How to Unstick a Block At a Certain Scroll Point
Make sure you have the sticky block selected from the list view. To be able to unstick a block, you need to give it a class element, by typing it into the Pushup Element box. In this example, the class is .stick. This push-up element is going to push the Sticky block up so that it’s not affected by scrolling.
You need to then select the Cover block from the list view and scroll through the settings for this block that are on the right-hand side of the page. The setting at the end is a drop-down option labeled Advanced.
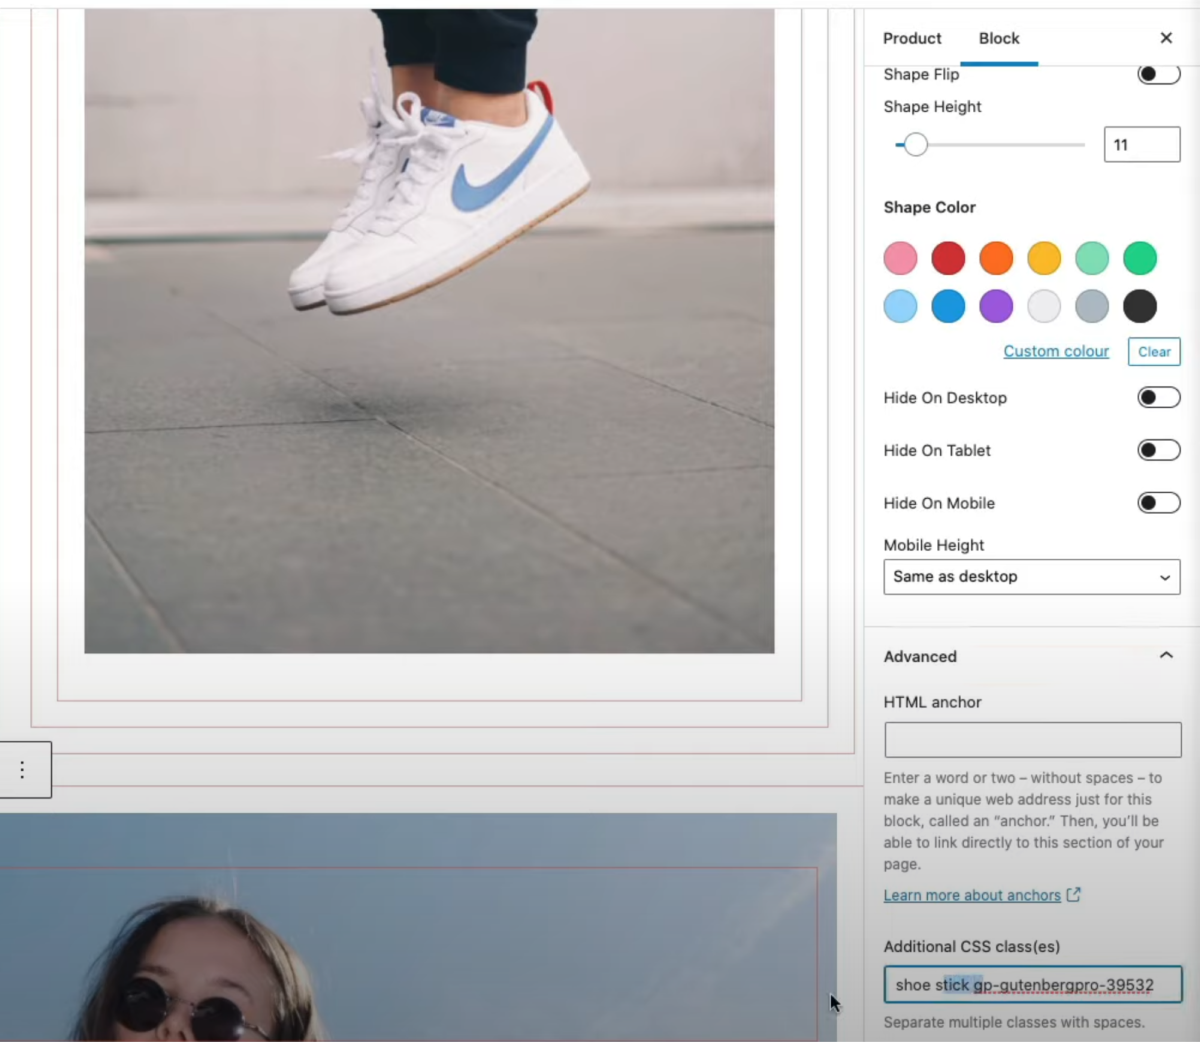
This Advanced setting will show you the Additional CSS class(es). It should include your class element (so in the example, it will include stick). This now means that when the Sticky block will hit the Cover block, it will unstick itself and move naturally.
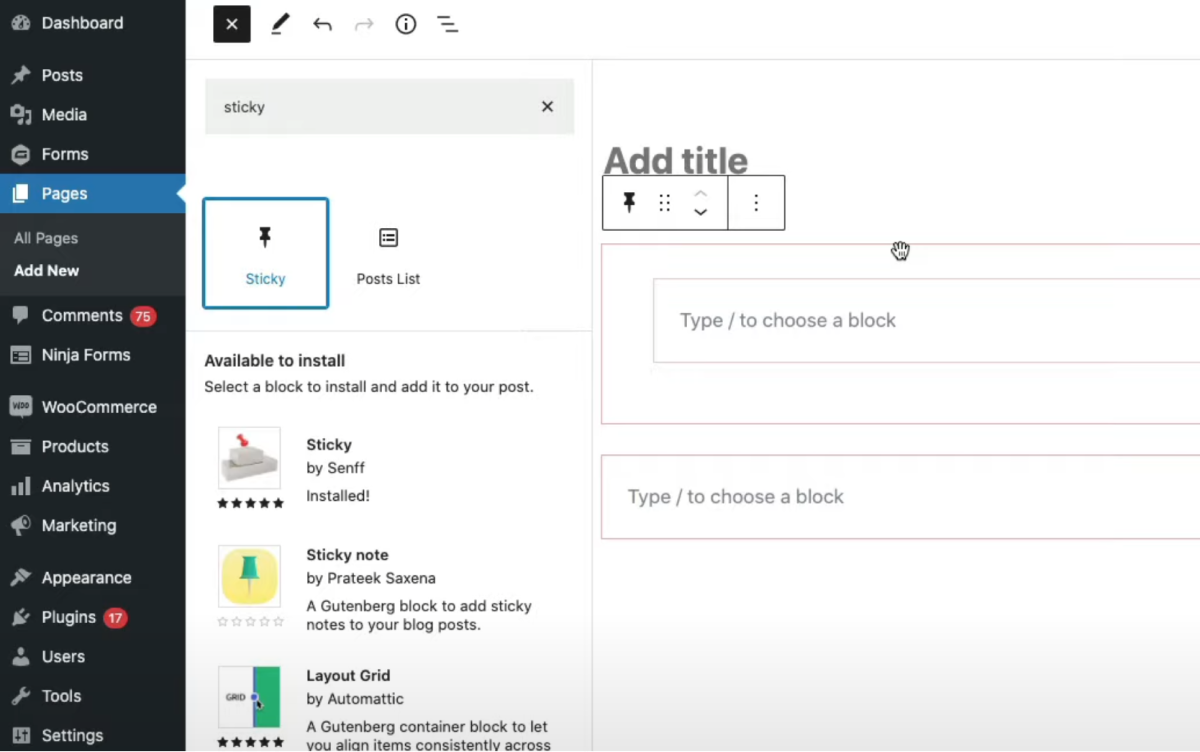
How to Add the Sticky Block
To add a Sticky Block, go to the WordPress editing page and select the block inserter (blue plus sign) from the left-hand corner. Simply search Sticky and add the block to your page by dragging it across. It’s a good idea to add the sticky block directly into a column block.
Conclusion
Hopefully, this has given you a better insight into creating a Sticky Scrolling Effect for your website, if you have any questions let me know in the comments below.
Leave a Reply