In this article, we’ll look at how you can use the Advanced Custom Fields (ACF) plugin, WordPress Custom Post Types, and Gutenberg full site editing (FSE) to create more complex WordPress websites.
We will be building a directory or listings website, however, once you understand how to implement Gutenberg FSE + ACF + Custom Posts, they can be used for many types of website.
This is a step-by-step guide aimed at beginners who want to build more complex WordPress websites, without using any code or page builders!
In particular, we’ll cover the following:
- Create Custom Post Type using the Custom Post Type UI plugin.
- Create Custom Fields using the Advanced Custom Fields plugin.
- Create Custom Layouts using Gutenberg FSE.
- How to display ACF in Gutenberg using the Stackable Pro plugin.
These four steps focus on making the listings template. This includes how to create and display an individual custom post type. Later on, we’ll take a look at how to actually use the listings template, and how to display it on your website.
Video tutorial
Here’s a ACF and Gutenberg video tutorial I made. There are chapter markers at the bottom of the video if you want to skip to specific places.
What You’ll Need
To start with, you’ll need an FSE theme. Some great examples of high-quality FSE themes you can use are:
These are all 100% free FSE themes by the way. The Twenty Twenty-Two theme is not actually production-ready yet but you can access it via the GitHub repository. It will be the next default theme that will launch with WordPress 5.9.
We’ll also be using the following plugins so make sure these are installed and activated before continuing:
- Gutenberg – At the moment this is needed for FSE to work
- ACF – To create custom fields
- Custom Post Type UI – To create custom posts
- Stackable Pro – Used to display ACF field content using Gutenberg
You’ll only need the Gutenberg plugin installed for now, because in December (when WordPress 5.9 is released) this will be automatically integrated into WordPress. Also, the Stackable Pro plugin will only be needed for one specific feature, which is to allow you to bring in dynamic content when creating layouts. We don’t need to use any of the blocks included with Stackable.
Step 1: Create a Custom Post Type
A custom post type is similar to a post or page in functionality but has a unique name in the database. It can be added to a code or a plugin. It’s very useful when you want to create separate lists of content for a specific purpose.
We’ll be using the Custom Post Type UI plugin to create a brand new post type, which will appear in the left-hand menu when active. To start with, you will need to select CPT UI from the main WP admin menu. This opens up the Add/Edit Post Types page, where you can begin filling out the fields in the Basic Settings section.
Enter the following field entries:
- Post Type Slug: films
- Plural Label: films
- Singular Label: film
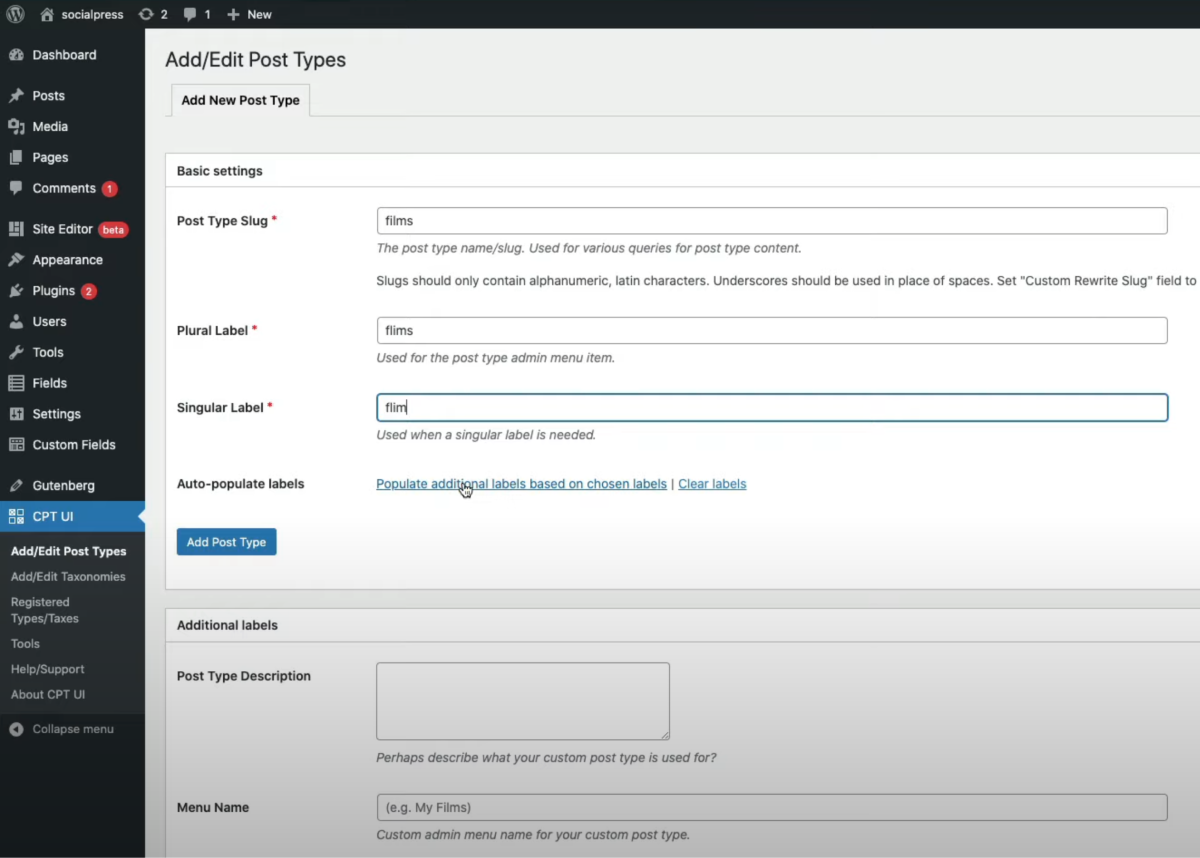
Also, don’t forget to click on the blue Populate additional labels based on chosen labels link. This will automatically fill out the rest of your additional post-type labels and save you a bunch of time. These labels will be used whenever you create a new film post.
After filling out the necessary fields, select the blue Add Post Type button to create the new custom post type. Immediately after, there will be a brand new My films option in the left-hand menu. The name of the option will be dependent on whatever you entered in the Basic Settings section.

Step 2: Create Custom Fields
This step involves creating two custom fields, using the Advanced Custom Fields plugin. We’ll only be going over the basics of this plugin, but you can check out tutorials online for more in-depth use.
In this film example, we will be creating two fields called movie director and movie date. These are special fields that are placed in specific places within our post layouts. To add a new custom field click the Custom Fields main menu link and then on the Add New button at the top, next to the Field Groups heading.
This will launch a new screen called Add New Field Group. You’ll want to start off by adding a title at the top such as ‘Film fields’. This isn’t publicly visible so is just for your own reference.
Scroll down to the Location section. This section allows you to change where you want to display your fields. This is why you created the custom post type in Step 1, so you can choose to show your custom fields (which we’ll get to shortly) on the post type film so that they’ll only be available for that particular post type.
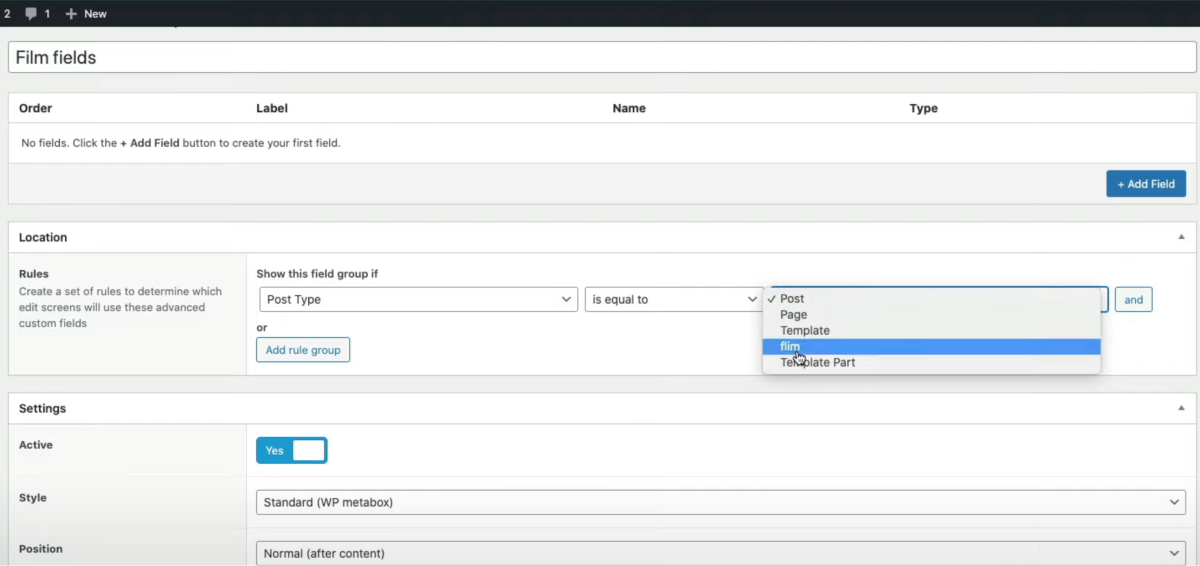
In the bottom right of the Order section, you can add a new field by clicking the blue Add Field button. You’ll then be shown a blank field to be edited. You can now fill in the Field Label, which will be the name that will appear on the EDIT page. In this example, we’ll enter ‘Movie date’.
This will auto-populate some other fields below, but you can still add a lot more options to your field. We can now add another custom field by clicking the Add Field button again and naming this new field as Movie Director.
ACF allows you to add different types of fields, but in this example, we have only used text fields. All you need to do now is publish the new field group. These new fields will be available for you if you select the post type in the left-hand menu, which will be under the name you used in Step 1, and so in our example, it will be under My films > Add new.
At the bottom of this page, you should see now that you have two new custom fields. In this case, Movie date and Movie Director.

Step 3: Create Custom Post Layouts
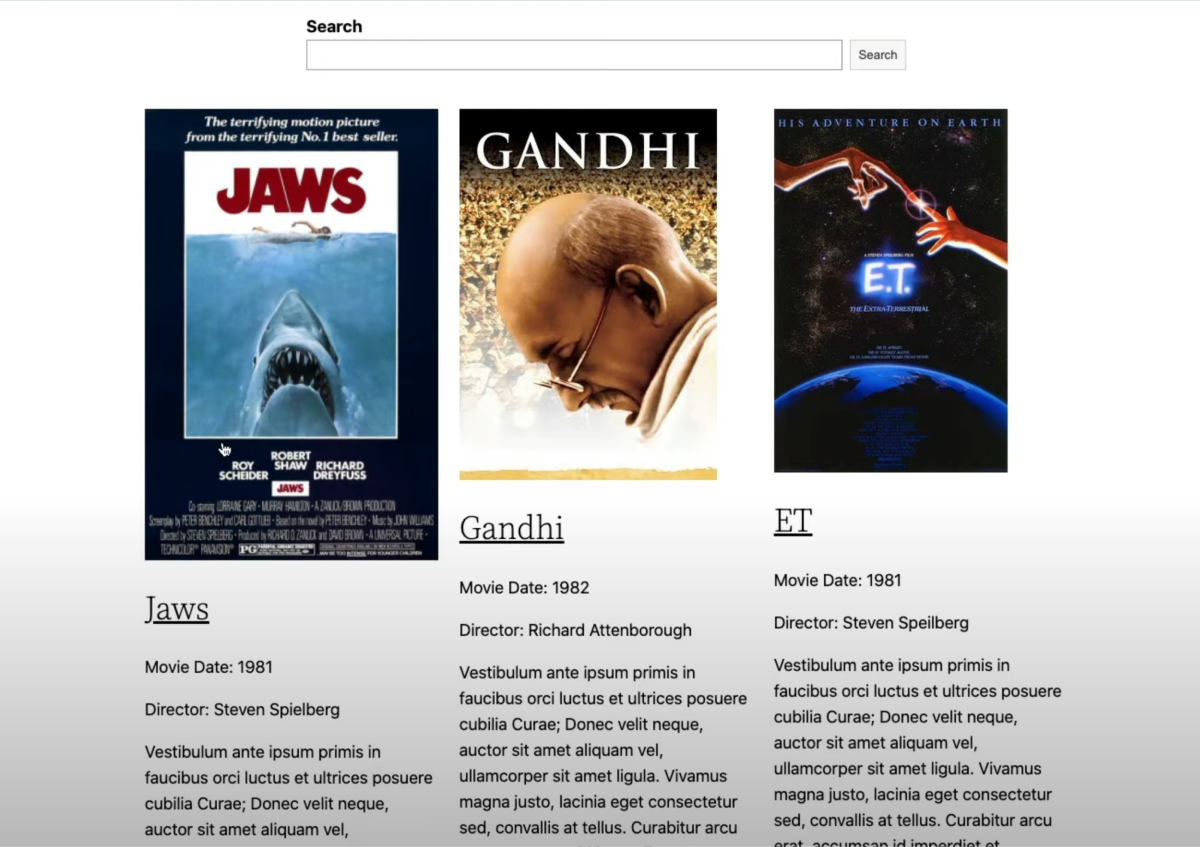
Gutenberg FSE allows you to create two completely unique layouts using blocks. The two custom layouts in this example will include the Individual Film Review page and a listings page for our film listings.
There are a few simple steps needed to create the two new templates. Start by selecting Appearance > Templates from the left-hand admin menu.
You can add a new template by selecting Add New at the top of the page. Then write in a new title in the centre of the page. The example title we used is ‘Film Listings Template’.
When you’ve added the title, click the Publish button at the top of the page. You can repeat the steps above to create a second template as needed.
Our second title is the ‘Individual Film Review’. To add this go to the Site Editor (beta), which is found in the left-hand column. (If you are unsure of what the Site Editor is, you can find more information about it here). Click the black and white WordPress logo at the top left corner of the admin screen and choose General templates from the list of template options. You’ll find your new templates listed here (the Twenty Twenty-Two theme is used here in the example).
We can start reconstructing our custom post layout by using the Film Listings Template. The page will be blank to start with, so you can start adding in options like a Custom Header to your page. Otherwise, to add in your ‘Films’, click the block inserter icon, which is the blue and white Plus symbol at the top left of your page, to open up a list of blocks.
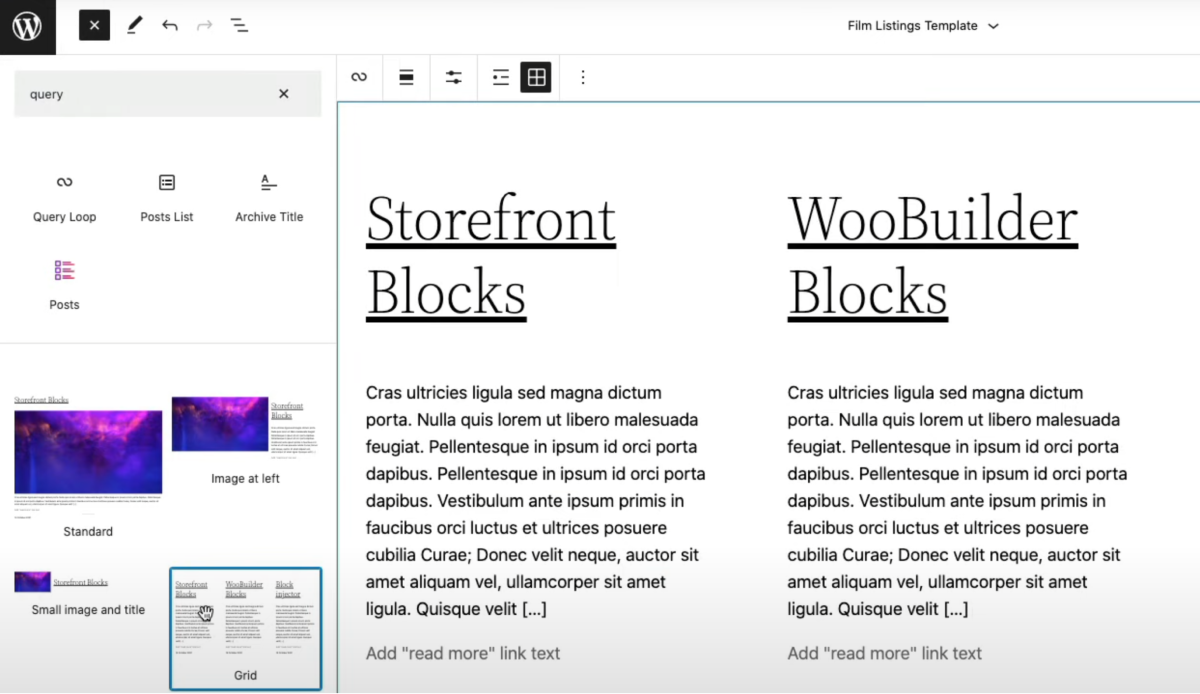
We’ll be using the Query Loop block to add in the features (if you’re not sure what these are then this video will help get you up to speed). Type in ‘Query’ into the search bar for the block to show up. There will be previews of some pre-built layouts that you can use, or you can add the query block and choose the layout after. One of the options is the Grid which is used in our example.
Initially, it will bring in a Grid layout of all your posts. However, on the right-hand side of the page, you have the option of changing the post type to either: post, page, or ‘film’ (this will show your custom post type instead). If you select your specifically named post type, your page will change and bring in your ‘Films’.
This has enabled us to start rebuilding the listings page, just by using blocks. If you click on the list view button at the top left of the page, you will be able to see all the blocks that are actively being used on your page.
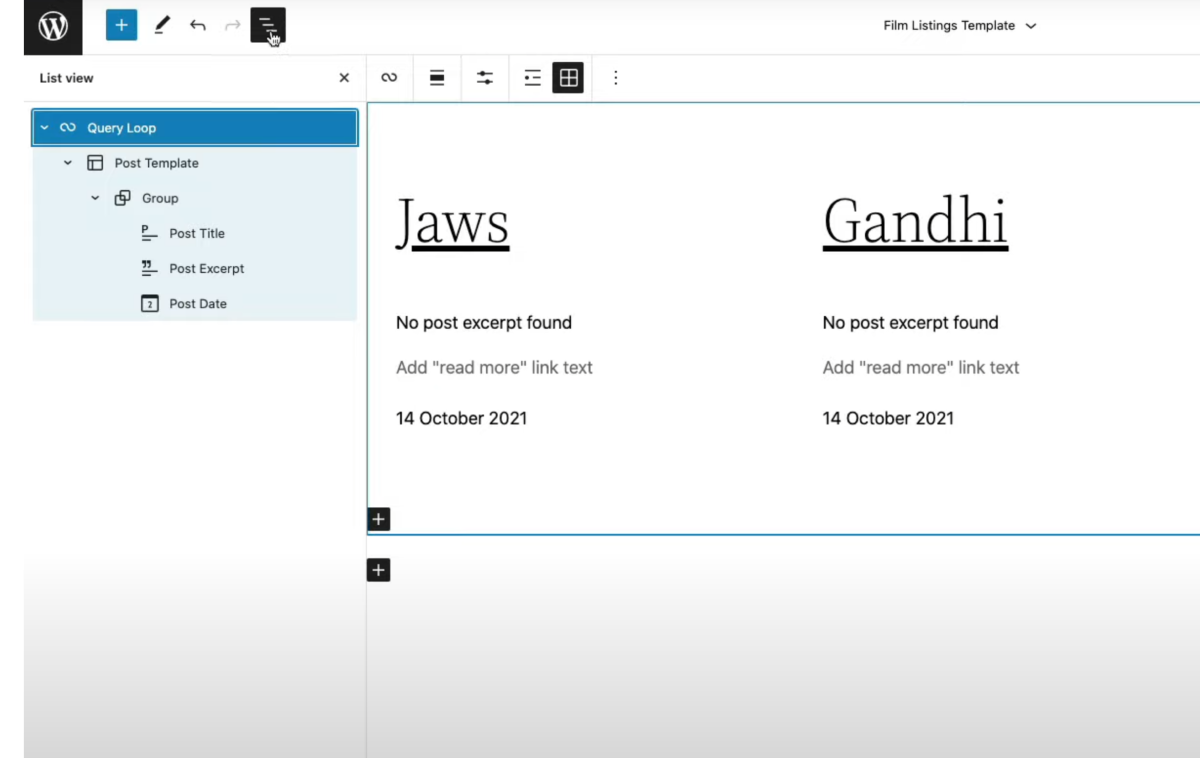
So, we now have the Query Loop block, the Post template block (similar to a container block, as it brings in certain blocks automatically), the Post Title (e.g. our film title), the Post Excerpt and the Post Date. If you don’t want one of these features, you can simply click on it, like the Post Date for example, and delete it.
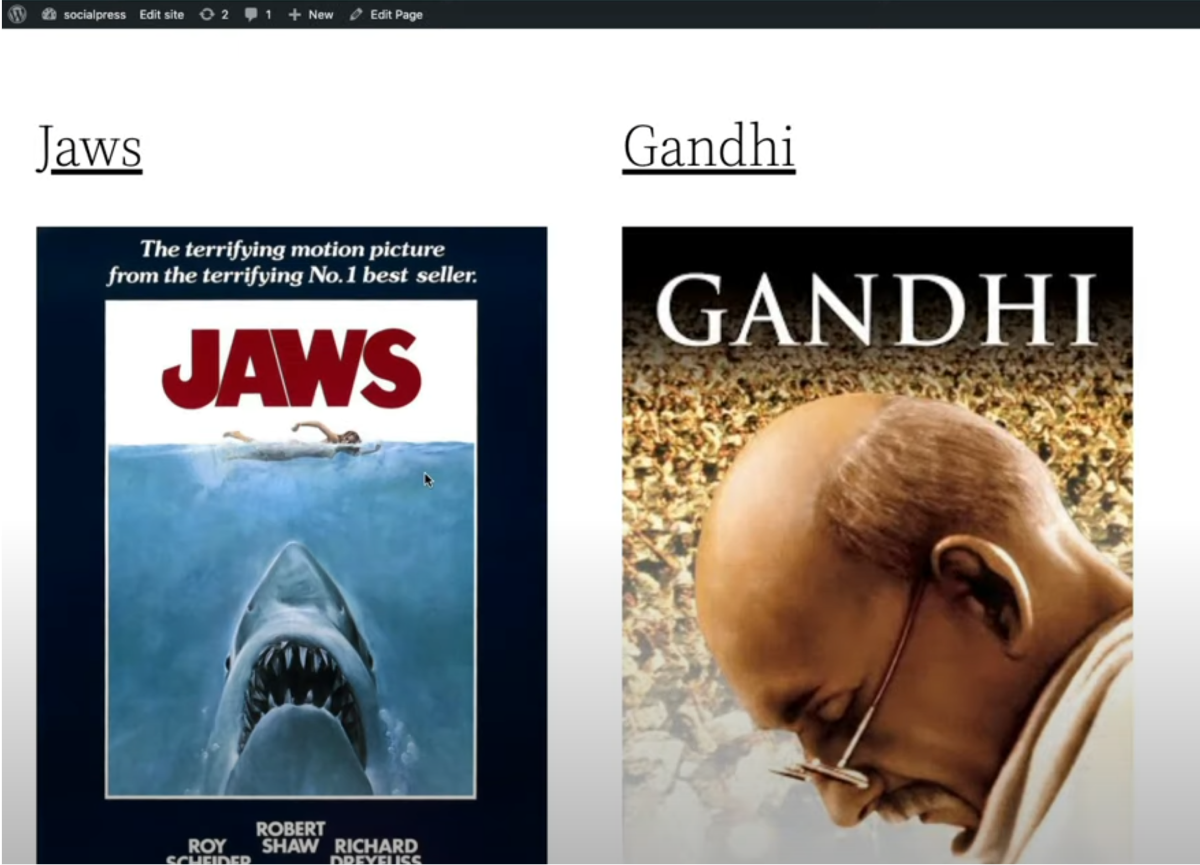
If you want a featured image for each of the posts, you can click on the block inserter icon again underneath the ‘film’ titles, and search for the Post Featured Image. After selecting it, you’ll be able to choose an existing image from the WordPress media image library.

You can also add in post content below the featured image, as well as the ‘read more’ text into each column. If you type into just one of the boxes, it will automatically link to the individual post itself and have the text repeated into each of the boxes.
Step 4: How to display ACF Content using Gutenberg
Moving on, we will look at Stackable Pro and the ability to have dynamic content. This links with why we have used advanced custom fields in the first place. Say for example you wanted to add in the Movie Date and Movie Director underneath each picture. You need to add a block by pressing the Add button under one of the photos and selecting the Paragraph block.
Try typing in ‘Movie Date: XXX’ into the empty space. If you highlight only the ‘XXX’ part, you can go to the menu bar above and select Dynamic Fields / Stackable button. It’ll open up a small box at the bottom of the page, so that you can bring in dynamic fields.

You have lots of options such as adding in a Post Title or a Post URL. If you search for your specific title, in this example Movie, you’ll see two fields that are being pulled automatically from ACF.
For us, the options are Movie Date and Movie Director. If we pull the Movie Date in and click Apply, it will dynamically grab that data and add it into the box, next to the words ‘Movie Date’. It will add the information into the other templates on the page as well (because of the Query Block we used earlier).
We also wanted to add in the Movie Director, so we follow the same steps as above. Click the: Plus sign > add in a Paragraph block (you could have this as a heading or different type of formatting if you wanted instead). Type in ‘Movie Director: XXX’ and highlight the ‘XXX’, (the ‘XXX is used only so that you can highlight some text for the stackable to be used). Choose the Stackable icon at the top, search for Movie in the field.
Choosing the Movie Director feature and clicking Apply means that you now have more dynamic content coming into that template. This is now a finished listings page. Having Gutenberg means that you can change the layout of your page however you like (such as changing the number of columns or adding in background colour), without having to use a page builder or code for it. With FSE you can build different archive pages and individual pages just with blocks!
How to display the Listings Template
So far we have created a template that’s been populated by a custom post type and two advanced custom fields. Now we have to show the listings page on the website. To create a new page, select New > Page from the admin toolbar at the top of the page. Add a page title such as ‘Film Listings’.
There will be a template section on the right-hand side of the page, where you’ll see a list of available templates. Select the Film Listings Template option.

The page is now going to automatically pull in that specific template to use. You can check this by going to view the full page. You’ll be able to see the advanced customs fields and full-page content that you have created.
How to create the individual Film Page
The final step now is to create the template for our Individual Film by using the Site Editor and Gutenberg blocks.
- Select the Site Editor (beta) link from the main admin menu
- Click on the WordPress logo in the top corner of the page
- Go to Templates.
- Select General templates
There it will show the page-home, ‘Film Listings Review’ (which have already gone through earlier), ‘Individual Film Review’, and General templates. If we select the Individual Film Review template (the custom template that we have not gone through yet), it will open up a blank new page. To rebuild your page and choose a layout design, you can use the Query Loop block by clicking the block inserter icon (this is the blue plus sign at the top of the page) and typing in ‘query’.
This block will give you layout options at the bottom of the screen to choose from. To achieve the same thing you can also click on the query loop and go through the layout designs by pressing the back and forth arrows. Once you have found a layout you want, press Choose from the top right of your screen.

By default, the page will show Posts only. You can change this by going to the Post Type Setting on the right of the page and selecting Film (or your custom Post Type).
Now we need to add the custom field information again. This means choosing a Paragraph Block and adding the Movie Date (or your own custom field). Using the Stackable Dynamic Fields Generator will automatically add in the date for your movie (see above under Step 3: Create Custom Post Layouts if you are unsure of how to do this, as it is explained in detail). Then repeat this for the Movie Director (or your other custom field).
To add more information to your page, you can place another paragraph block. Start typing /PostContent while inside your paragraph block and select the Post content block from the popup block inserter. This will now show as a new paragraph of text on your page.
If you’re using a query block (as we have been), it is important to click Inherit Query from template. This can be found under Settings on the right-hand side of the page. This means that it will use that query for the particular post that we are working on.

Gutenberg allows you to change aspects of the page easily. For example, you can easily switch columns around or change the size of the image.
When you create these film posts, you need to go to the right-hand side of the page and select Individual Film Review. This means that it will pull that template in automatically for that particular film, otherwise, the films will be using the old templates.
Conclusion
So by now you should have a good idea of how to create a listings template and be able to display it on your website. Using Advanced Custom Fields and Gutenberg means that you don’t have to use a page builder or code by hand, so it’s perfect for beginners!
This video gives a full explanation of this article and shows you visually how to create a listings page.
Leave a Reply