WooBuilder Blocks is our WordPress plugin that lets you customize the WooCommerce Single Product Page using the WordPress Block Editor (Gutenberg).
This article explains how you can create Templates and then apply your Templates to multiple WooCommerce Products.
You can also use your Templates on a ‘per product’ basis.
Let’s dive right in 🙂
How to create your first Template
Step 1 – Create your product layout using WooBuilder Blocks
First, you need to create your product layout in the normal way using WooBuilder Blocks.
It’s a good idea to remember what product you used to create the template, in case you need to edit and make changes.
Important! WooBuilder Templates will only be applied to WooCommerce Products that have been built using the Classic Editor. This is so templates don’t override any products that have been designed and built on a per-product basis with WooBuilder Blocks. Click here to see how to revert to the normal WooCommerce editor.
Step 2 – Save your product layout as a template
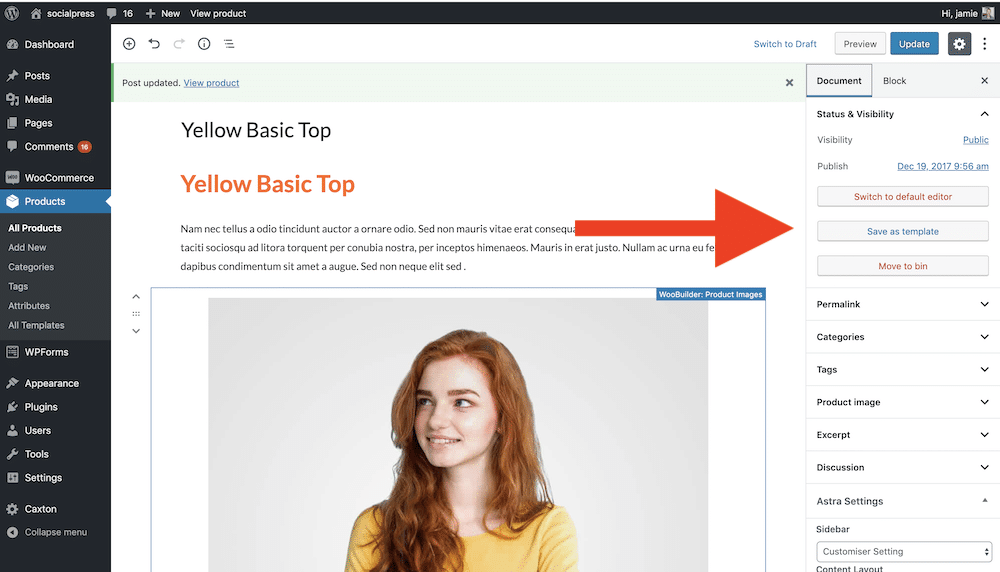
Once you have saved or published your product click on the ‘Save as template’ button in the right hand side bar. You may need to click on the ‘Document’ tab to see this button.
Step 3 – Name your template
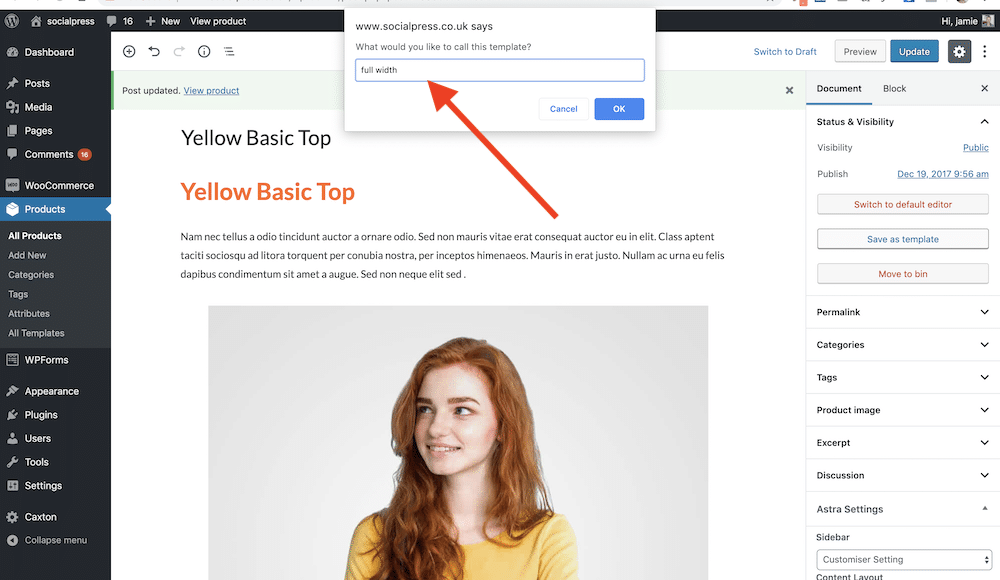
After you click on ‘Save as template’ you will see a box where you can give your template a name and save it by clicking ‘ok’
Step 4 – Assign what categories you want to apply your template to
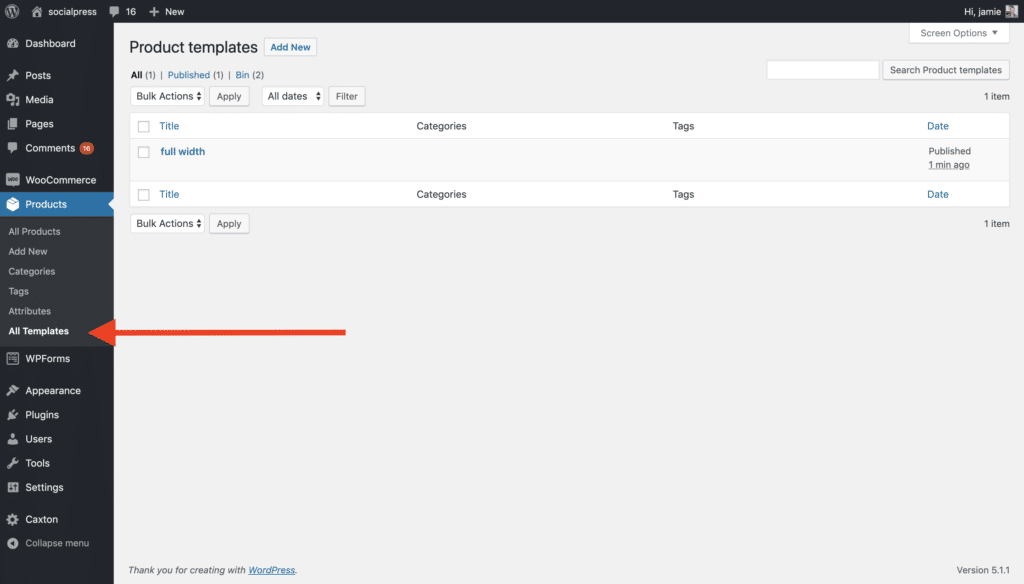
You’ll find your template by going to Dashboard / Products / All Templates
Click on All Templates and you’ll see all your templates.
Next hover over the template name in the list and click on ‘edit’ or ‘quick edit’. Quick edit is quicker 🙂
Step 5 – Assign template categories
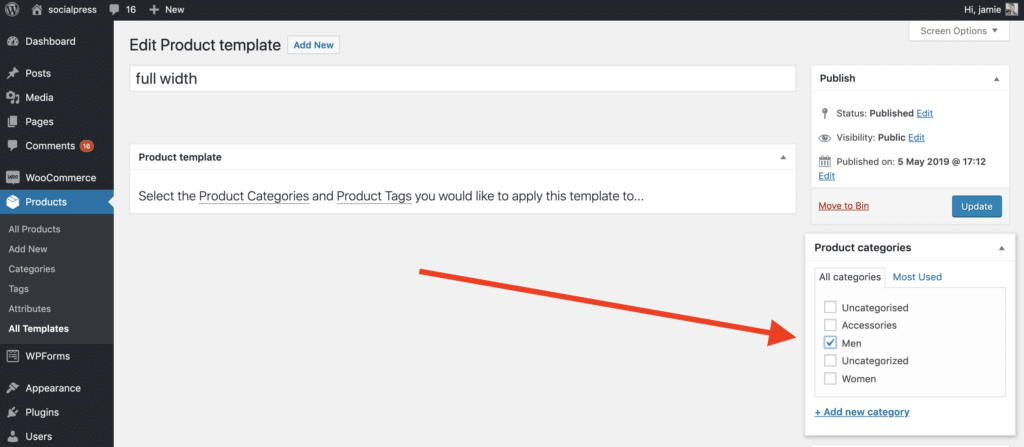
Now you can assign what Product categories you want to assign your template to. Just select them as shown in the picture below and click update.
And that’s it, your template will be automatically assigned to any products that use those categories!
If you want more templates, just repeat the process.
Step 6 – How to edit your templates
To edit your template you need to repeat the process
- Go back to the product that you used to create your template and make your changes
- Save it as a new template
- Go to Dashboard / Products / All templates and re-assign categories
- Make sure to either delete the old template or un-assign categories
Important! WooBuilder Templates will only be applied to WooCommerce Products that have been built using the Classic Editor. This is so templates don’t override any products that have been designed and built on a per-product basis with WooBuilder Blocks. Click here to see how to revert to the normal WooCommerce editor.
Step 7 – How to use Templates on a ‘per product’ basis
Sometimes you might want to use your Templates only on a one product or a small subset of products. With WooBuilder Blocks you can use your Templates one product at a time.
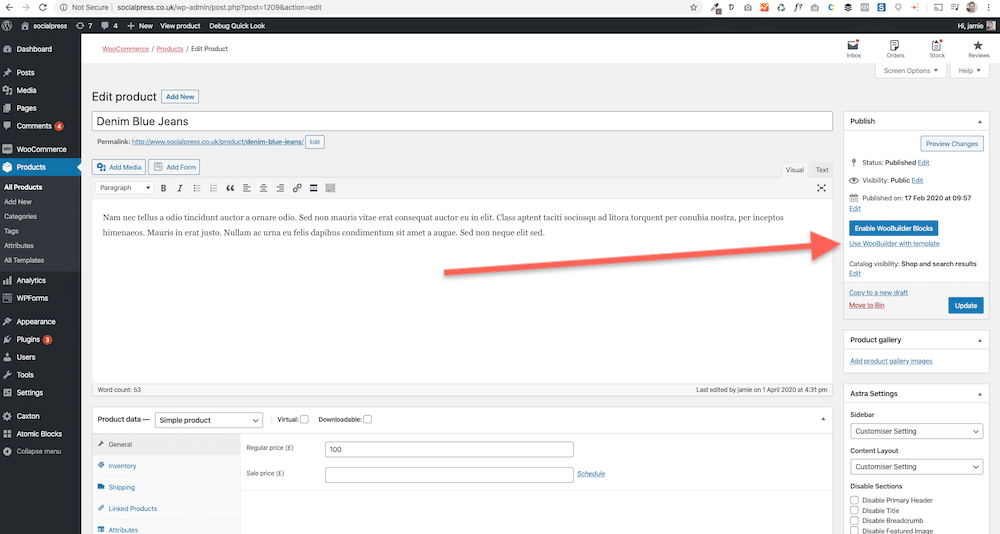
When viewing your product in the edit screen, click on ‘Use WooBuilder with template’.
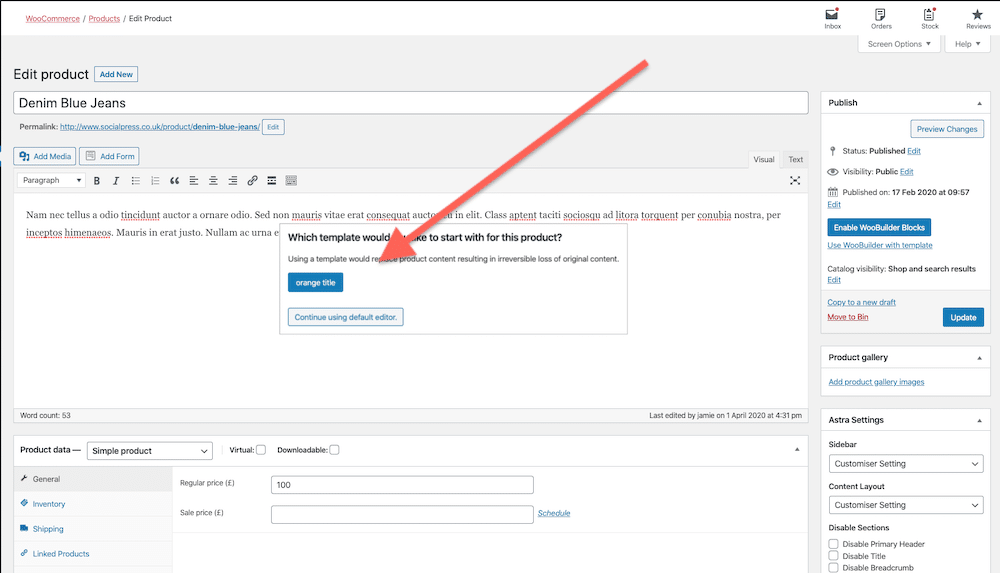
Next you’ll see a pop up box that will let you choose which template you want to use for that product. Click on the template you want and that template will be loaded for you.
Once the template loads into the page you can make any changes you want. Then publish (or update).
Step 8 – How to revert to the normal WooCommerce editor
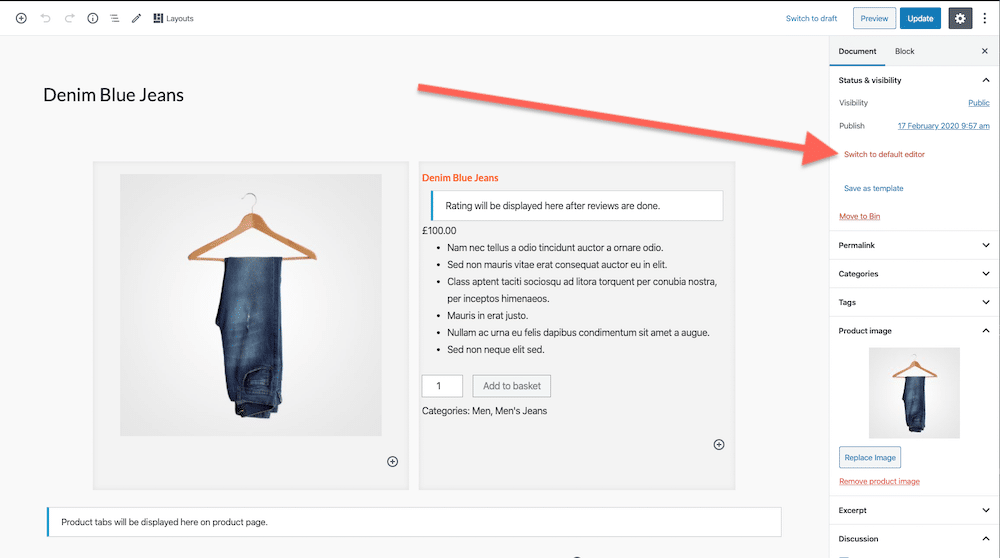
Sometimes you might want to revert to using the normal WooCommerce editor.
Just click on ‘Switch to default editor’ as show in the picture below.
Top tip! After you switch to default editor click on the Text tab in the WooCommerce editor and delete any code.
Step 9 – Using the WooCommerce Tabs block, long description and templates
WooBuilder Blocks utilizes WooCommerce Tabs in a slightly special way.
Your WooCommerce Long description appears automatically in the Tabs on your product page, but because WooBuilder Blocks uses the content area (long description) to design the product layout we work in a slightly different way.
The Long Description Block
- You can use the Long Description Block to put your description into – we’ve built the Long Description Block as a Container Block, so that you can put multiple Blocks within it.
- When When using templates on multiple products WooBuilder Blocks dynamically and automatically picks up the long description within each product data and puts it in the your Product Pages.
The Tabs Block
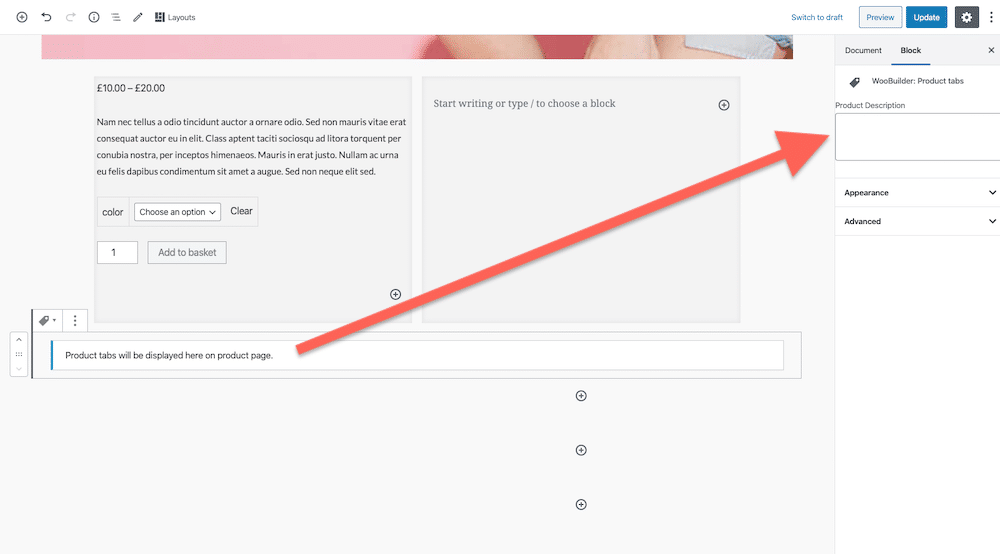
- If you want the long description to appear in the Tabs section. When you create products individually then you manually input the Product description (see pic below)
- When using templates on multiple products WooBuilder Blocks automatically picks up the Long Description content within each product and puts it in the WooCommerce Tabs Block.
How to manually enter the long description into the WooCommerce Tabs Block
I hope you found that useful, if you have any questions, either leave them in the comments below or contact support.
Leave a Reply