Shoppers browsing your WooCommerce store may find some products interesting but they might not be ready to buy them just yet. So, instead of adding them to their shopping cart, they might prefer to add them to a WooCommerce wishlist.
For instance, shoppers may browse products from their mobile devices but decide to purchase later from their desktop at home or after doing more research. Once they have a product picked out, all they have to do is to click the add to cart button and checkout.
Ideally, you want to find a way to retain these products in shopper’s carts and encourage hesitant customers to visit your eCommerce store again. In this article, we’ll discuss why it’s important to include wishlists in your WooCommerce store and how you can use them to retain customers and increase conversions. We’ll also show you step-by-step how to add a wishlist to your WooCommerce store.
What are WooCommerce wishlists?
Wishlists are perhaps one of the most underrated eCommerce features. They offer an easy way of increasing sales and conversions on your WooCommerce store but, although very useful, wishlists are not used by most online stores.
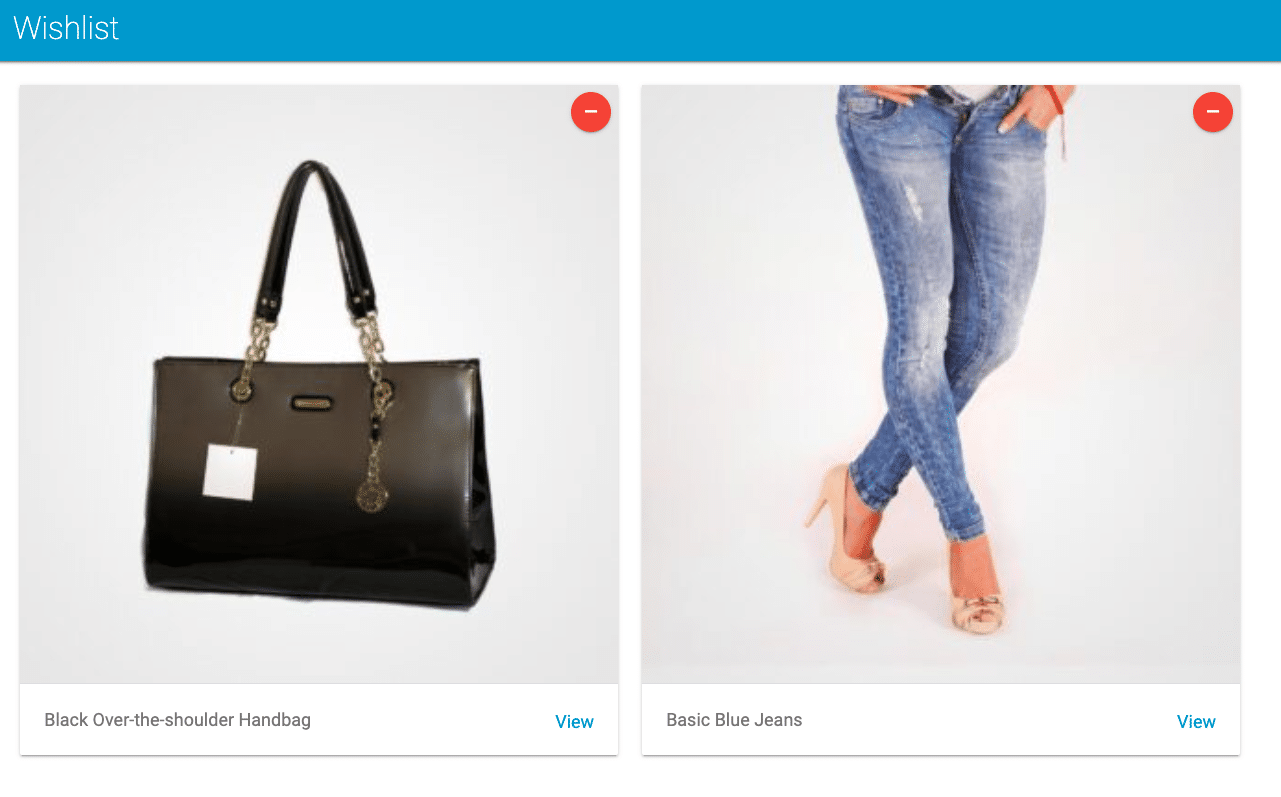
Before we jump into the specifics, let’s take a step back and understand what the wishlist functionality is in WooCommerce. A wishlist is a feature you can add to your WooCommerce store that allows customers to bookmark their favorite products in a list. In simple words, it’s a list of viewed products that shoppers on your online store have saved for later.
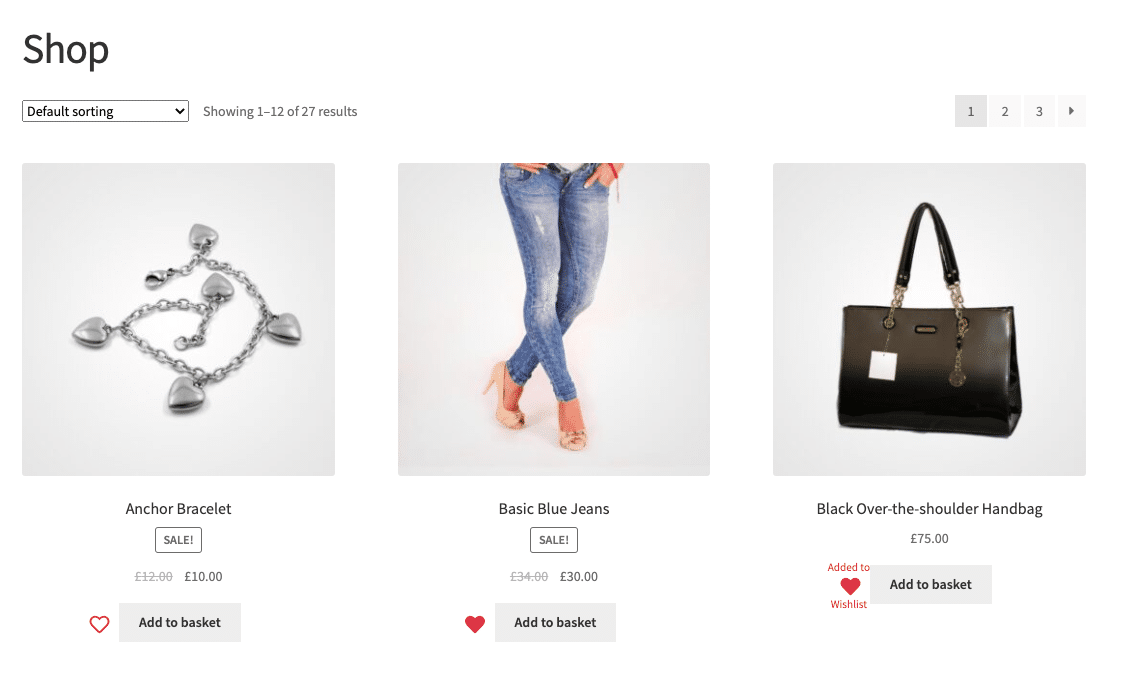
For instance, when users visit your WooCommerce store, they can add one or more items they are interested in into one or more personal lists. Products in these “lists” can be added or removed by clicking on a heart or star button on each product. This way, customers can quickly view the products they want to buy from your store. As a result, it makes it easier for them to make purchases from your WooCommerce store when they’re ready.
Why WooCommerce wishlists are important for sellers
WooCommerce wishlists work great for keeping customers on your online store focused and help facilitate a later purchase. Customers who are undecided can simply save items to buy them when they’ve made up their minds. Wishlists also help shoppers quickly checkout from your WooCommerce store as they don’t have to find each product again and add them to their cart.
As a store owner, you always look for ways to improve conversions, and wishlists offer a robust solution for that. Customers are incentivised to make purchases when all of their favorite products are presented to them in an easy-to-navigate list. It’s also very common for retailers to send out follow-up emails mentioning the items added to a wishlist to encourage sales. Half of the work is already done for them, all they need to do is add their payment details and checkout from your WooCommerce store.
In addition to this, wishlists also help you keep an eye on each product’s popularity among shoppers. It signifies the customer’s interest in a specific product without an immediate intent to purchase it. If the product is added to most shoppers’ wishlists already, there’s a high chance that it will bring in lots of sales.
Finally, WooCommerce wishlists are great for social media sharing and improving brand awareness as a result. When shoppers share a wishlist that is built on your online store, they endorse or approve your store or brand. Other people who view the wishlist will be more likely to visit your WooCommerce store to make their own wishlist.
Why wishlists are important for buyers
Wishlists may be great for increasing sales and conversions on your online store but they’re also important for your customers. They are a life-saver for slow buyers who want to compare similar products first before they make a purchase decision. This helps them conveniently compare between products so that they can pick the right one.
Wishlists can also be used as mood boards or gift lists as they help users keep track of what they liked and to remind them of what they saw when browsing your WooCommerce store. The best part about wishlists is that they are accessible across all devices. This means that customers that have wishlists saved within their account can access or view them from any computer or phone they log in from. The easier it is for shoppers to access the wishlist, the faster they will be able to purchase those products from your WooCommerce store when they’re ready.
Additionally, wishlists also help facilitate communication between a gift receiver and a gift-giver. Users can save and share a list of multiple items they liked with their loved ones to nudge them to get these items for them as a gift. For instance, a customer could share their wishlist with their significant other on their anniversary date. They’re also perfect for birthdays, weddings, and baby showers.
How to create a wishlist in WooCommerce
WooCommerce by default doesn’t offer functionality that lets you create a wishlist on your online store, you need to use a plugin for this.
Using the Storefront Pro plugin with the Wishlist addon, you can easily and quickly add wishlists to your WooCommerce store. The Storefront Pro Wishlist is a free app for all current Storefront Pro subscribers.
Here, we’ll show you how to create a wishlist in WooCommerce using Storefront Pro and the Wishlist addon.
First things first, start by making sure you have the Storefront Pro plugin installed and activated on your WooCommerce site. Once that’s done, you want to download the Wishlist addon and also install it on your WordPress site.
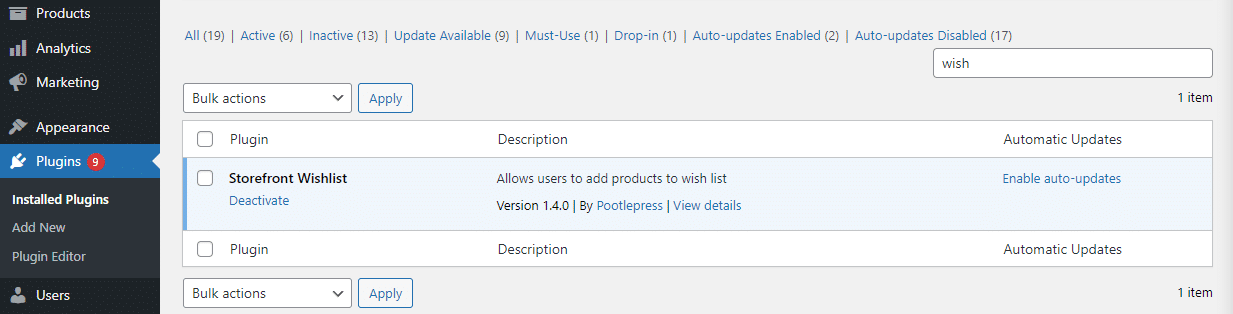
Simply upload the ZIP file by navigating to Plugins → Add New → Upload using the WordPress admin panel dashboard. Once the plugin is installed, you need to activate it by going to the plugins page and clicking the Activate button under Storefront Wishlist.
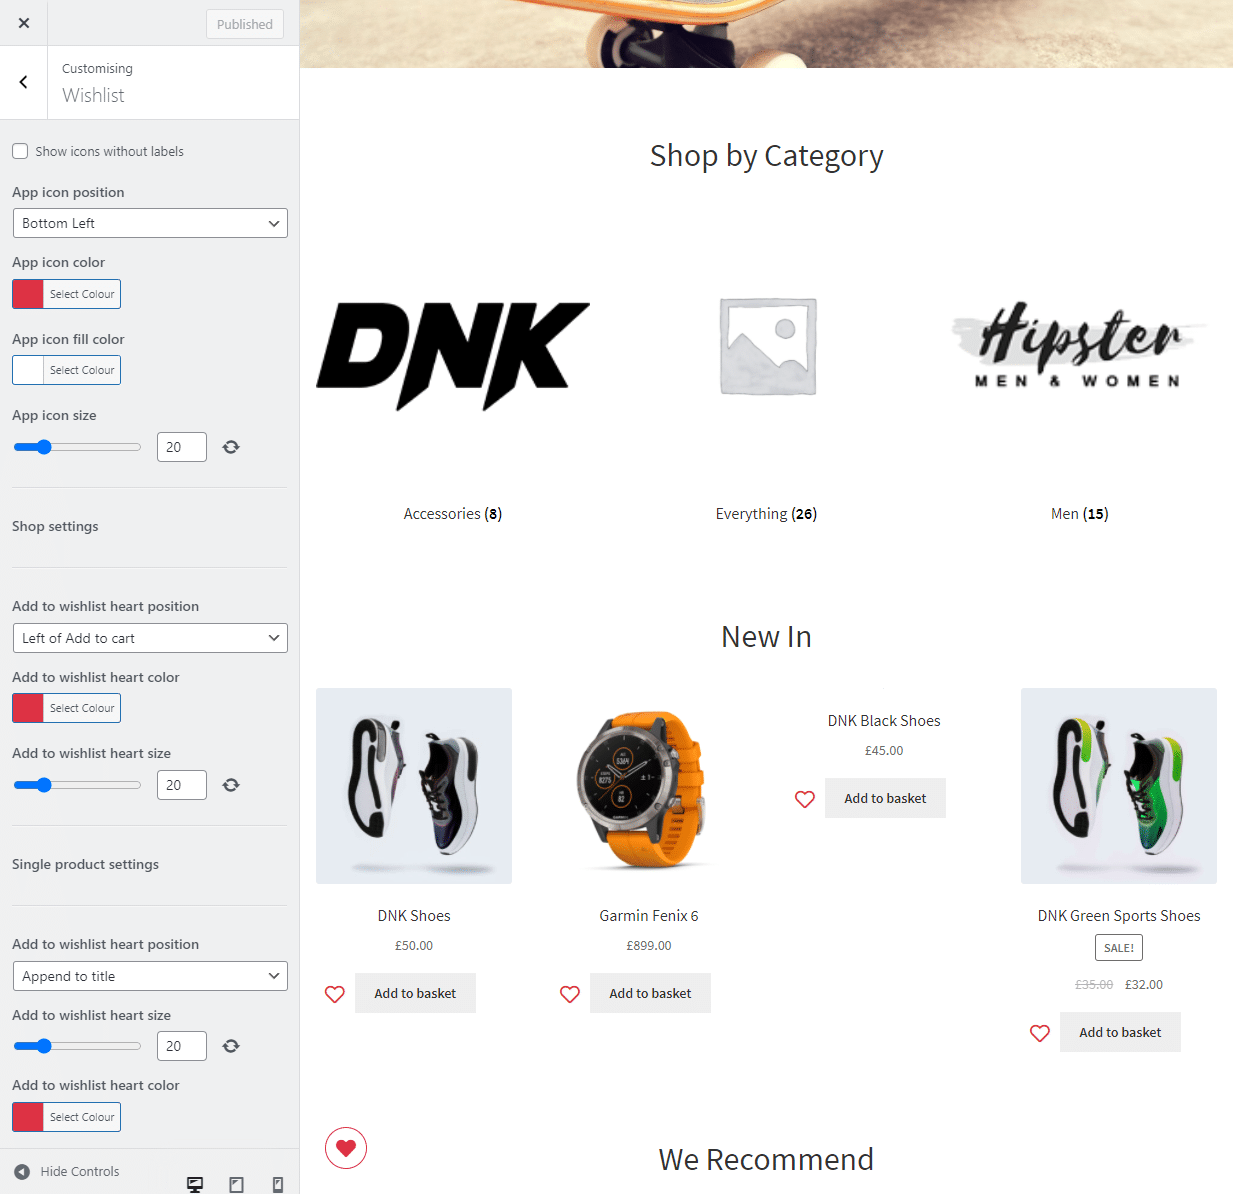
By default, WooCommerce will use the styling options from the theme and from WooCommerce itself. However, if you want something else, you can customise your wishlist buttons by clicking on the page’s Customize button and selecting Wishlists from the menu.
Here, you customise the app icon by setting the App icon position, App icon color, App icon fill color, and App icon size. This way, you can fully customise your app icon button and how it appears on the front-end of your WooCommerce store. You can also change the Add to wishlist heart position and customise its colour and size options. Additionally, you can also set the add to wishlist button or heart position, size, and colour for single product pages on your online store.
Letting customers create wishlists is simple to do, but managing them can be a challenge. Ideally, you want to exclude guest users from using this feature and offer wishlist creation for logged-in customers only. This way, you incentivise people to sign-up with you to save their favorite products to purchase later.
You also want to let customers customise the name of their unique wishlists. It’s a simple way of adding a personal touch to their wishlists and helps shoppers manage multiple wishlists. For instance, people can create a wishlist specifically for sporting goods products and one for clothing products only. On the other hand, you can also restrict users from creating multiple wishlists. This way, customers will have to “buy” their previous wishlist first before they can create a new one.
Restricting the number of items shoppers can add to the wishlist can be a great sales tactic. By limiting the wishlist to selected product categories or a specific number, you make it easier for shoppers to “empty” the wishlist. In simpler words, shoppers will take the wishlist more seriously and find it easier to purchase fewer products inside of the list.
When offering the option to create wishlists on your WooCommerce store, it’s best to allow the creation of private wishlists. By enforcing wishlist privacy, you make it much more comfortable for shoppers to add a number of products to their list. If wishlists are public on your WooCommerce store, shoppers will have an easier time sharing their wishlists with other people or gift-givers.
One of the most important parts of a wishlist is the Add all to cart button. This button allows the customer to add all products to their cart and checkout from your WooCommerce store within a few clicks. It makes it easier and much faster for shoppers to check out their entire wishlist from your WooCommerce store. As a result, it helps boost sales and increase conversions on your online store.
Now that we’ve seen how easy it is to set up and manage wishlists on your WooCommerce store, it’s time to set it up on your online store. Wishlists are one of the most useful features for any eCommerce shop and a powerful marketing tool. For example, you could try to observe what your customers added to their wishlists and decide to offer a special discount or send promotional emails to boost your customers’ loyalty and encourage purchases.
Conclusion
Wishlists offer a simple solution for letting customers “save” their desired products when shopping from your WooCommerce store so that they can buy them at a later time.
Although it’s not mandatory to have a wishlist feature in your WooCommerce store, adding the option can be a valuable asset. It can help your store look and feel unique. As a result, this helps your WooCommerce store stand out from the rest of the competition. Wishlists give your customers more control and encourage them to return to your website again to purchase their wishlist items.
This ultimately helps boost sales and conversions on your WooCommerce store. In addition to this, wishlists are also an indirect way to increase the visibility of your online store and attract new customers as your current users can share their lists with family and friends.
Ready to easily start creating and managing wishlists on your WooCommerce store? Get Storefront Pro with the Wishlist addon today!
Leave a Reply