With the release of WordPress version 5 came a brand new default 2019 Theme. The Twenty Nineteen theme features a great design and is lightweight and fast.
I’ve been playing with the Twenty Nineteen Theme today whilst testing the next version of our Shape Divider Block, that is part of our Caxton plugin.
They are few things that I wanted to change;
5 customizations for the 2019 WordPress Theme
Time needed: 25 minutes.
Here’s the five customizations that I’ll show you how to do
- How to reduce the height of the 2019 Theme Featured image
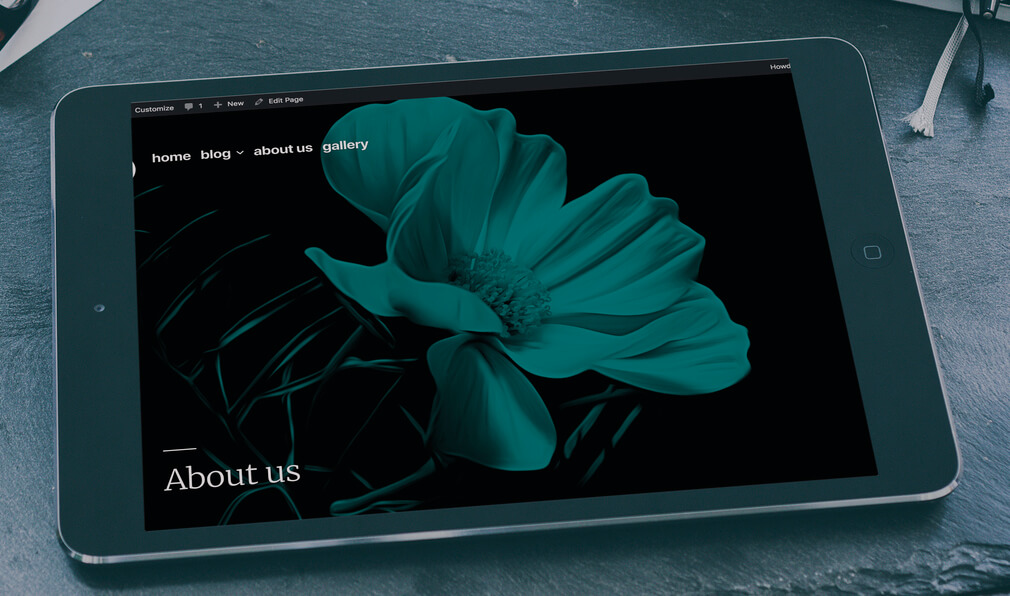
By default the 2019 featured image is set to fill the full height of the screen. This looks great, but the downside is that your readers have to scroll to see your content. I’ll show you how to reduce the height of the feat
- How to increase the width and reduce the margin of the 2019 Theme
The 2019 Theme page width is narrow – I’ll show you how to fill the right the way across the page.
- How to remove margin underneath the Featured image so that the first row using Gutenberg sits flush
If you use the new Block editor you might want to first row to sit flush under the navigation. Here I will show you how.
- How to change the colour overlay of the 2019 Featured image per page
I’ll show you how to change the overlay color per page
- How to change fonts on the 2019 Theme
I’ll show you how to change the fonts on the 2019 theme
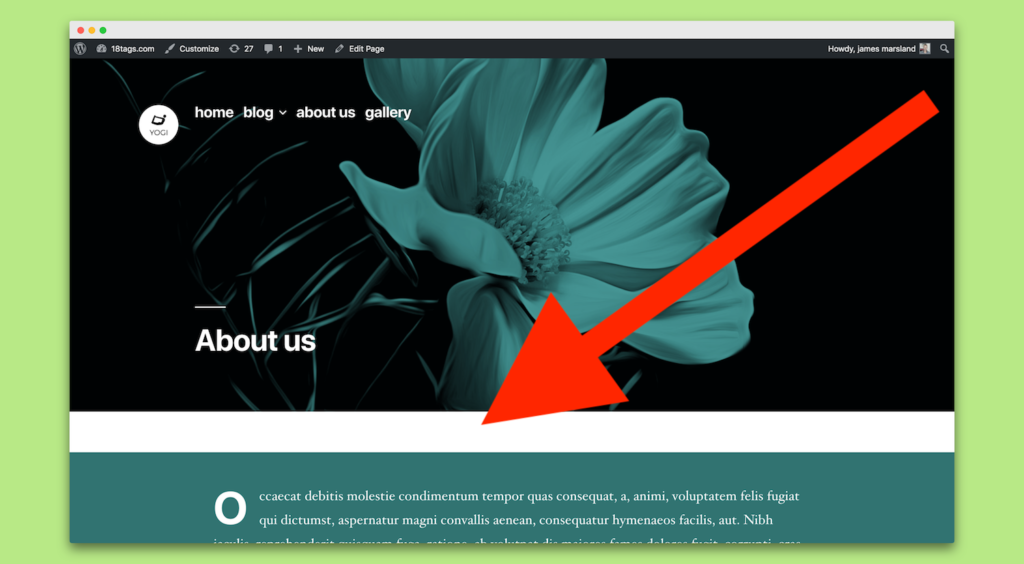
How to reduce the height of the 2019 Theme featured image
By default the 2019 featured image is set to fill the full height of the screen. This looks great, but the downside is that your readers have to scroll to see your content.
To reduce the height of the 2019 Theme featured image, we just need a simple bit of CSS. Put this in the WordPress customizer. Click on customize / additional css. Change the value 70vh to whatever you would like, with 100 being full height.
.site-header.featured-image {
min-height: 70vh;
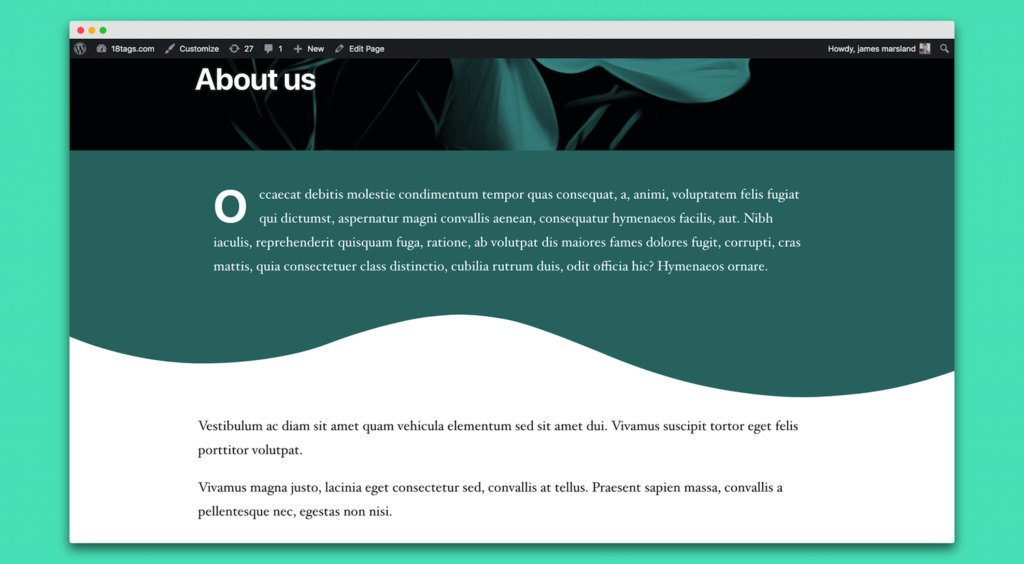
}The 2019 Featured image (without tweak)
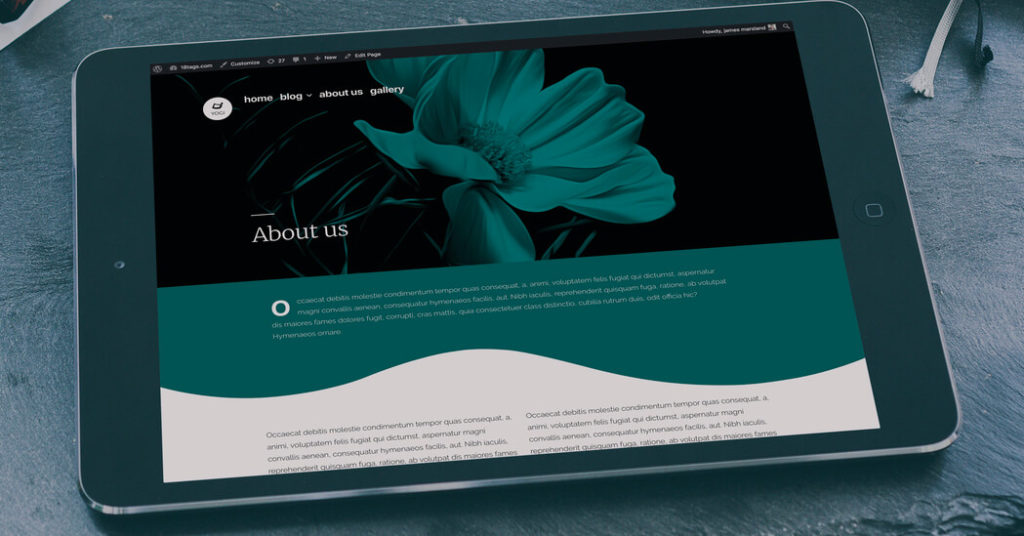
The 2019 Featured image (after tweak)
That lovely wave effect is created by using our Caxton plugin, Shape Divider Block.
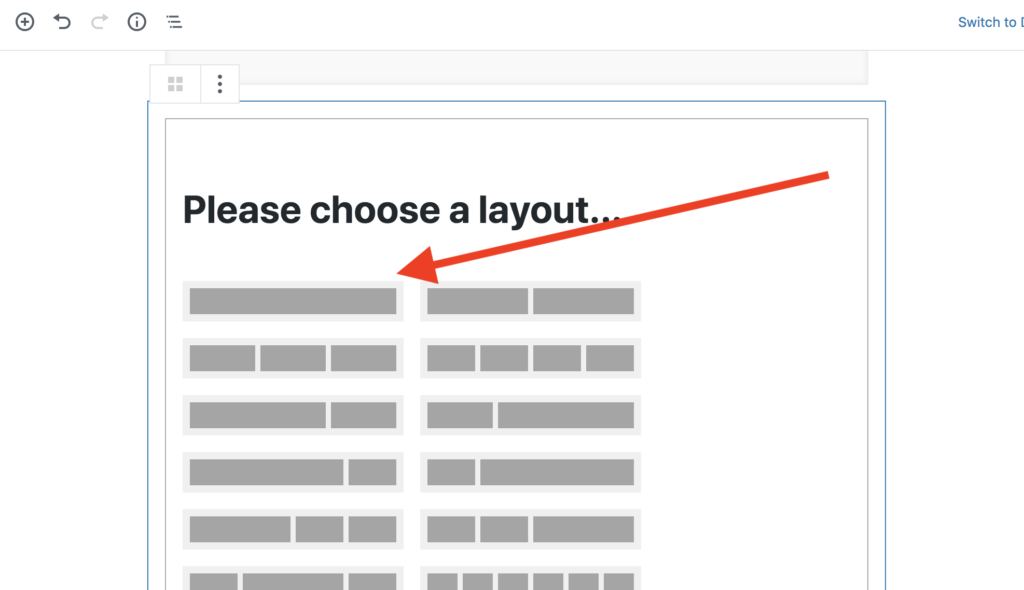
How to increase 2019 Theme page width
The 2019 Theme page width is a little bit narrow so I wanted the text to fill the right the way across the page. Luckily this is super easy – we just need to use our Caxton Layout Block .
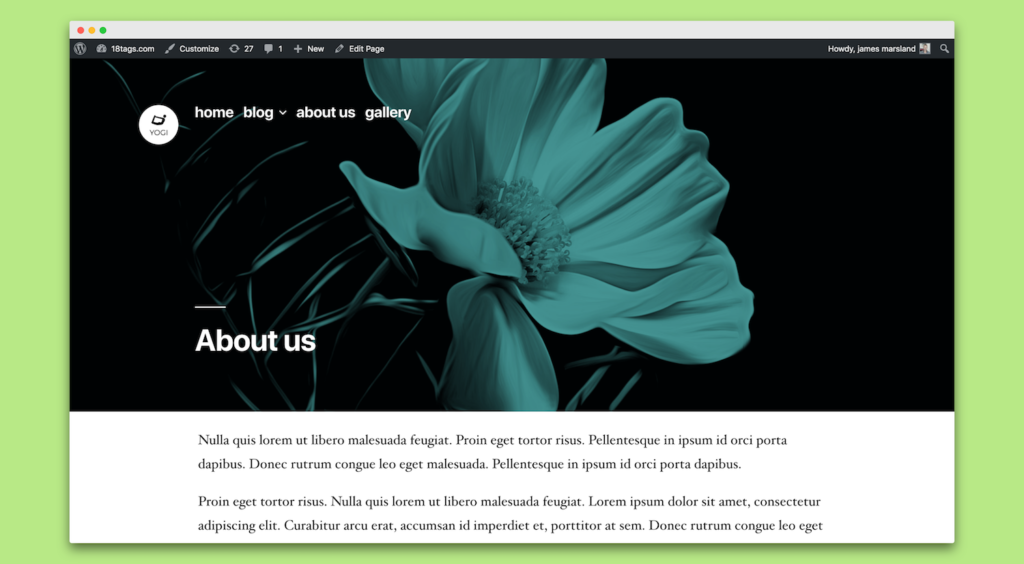
Text now fills the page width
How to remove the margin underneath the 2019 Theme Featured image
To fully utilise the new Gutenberg Editor that is part of WordPress Version 5, I wanted to remove the margin underneath the 2019 Theme Featured image.
The margin looks great when you just want to have text under the featured image, but in my case I wanted to use our Caxton Shape Divider Block to create a nice transition into the page content. So I needed to reduce the margin under the featured image so that the first row sat flush underneath. Luckily all we need is a simple line of CSS.
.site-header.featured-image {
  margin-bottom: 0rem;
}
And the result is that the first row now sites nicely underneath the 2019 Theme featured image.
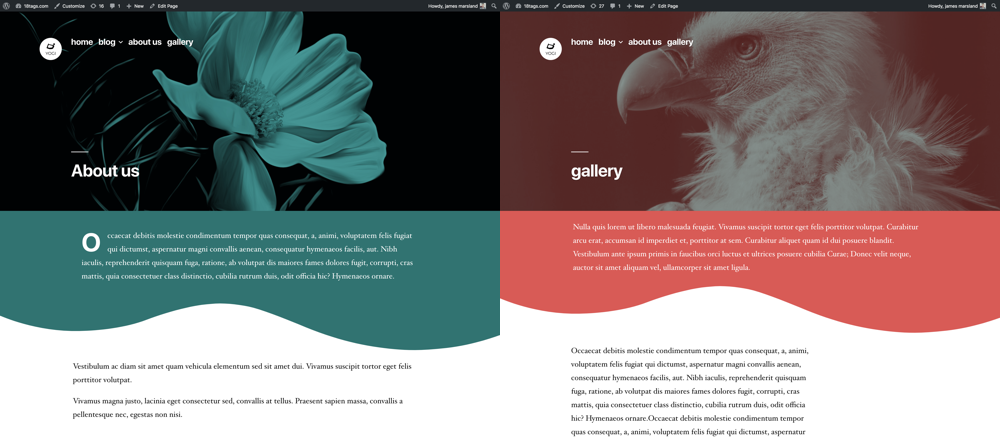
How to change the colour overlay of the 2019 Theme Featured Image per page
The 2019 Theme lets us add a colour overlay onto our Featured Images.
By default the coloured overlay is applied ‘site-wide’.
I wanted to match the colour overlay of the 2019 Featured Image to the first row in each of my pages. Below shows the result of my customization. See how the colour overlay is different in each page, and matches the colour of the first row on my page.
So again a simple bit of CSS is all we need. But we need to add one small step so that we target each page we want to change.
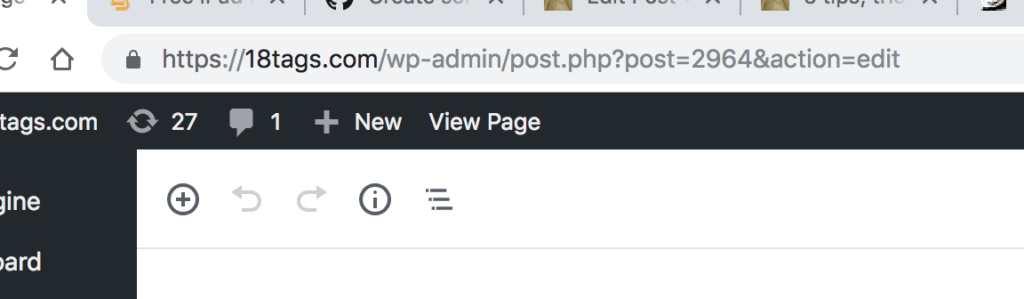
First we need to grab the id of the page for which we want to change the overlay colour of the Featured Image. To do this, click on edit page and look in the address bar. You will see a number after ‘post=’.
This is the id of the page.
In the example below the page id is 2964
Now we have the id of the page we need to target that page with our css.
So use the following code, replacing the page id with your page id and also changing the background colour to your colour. You could also change the opacity of the overlay here as well.
.page-id-2964.image-filters-enabled .site-header.featured-image:after {
background: #e3b1b1;
opacity: .38;
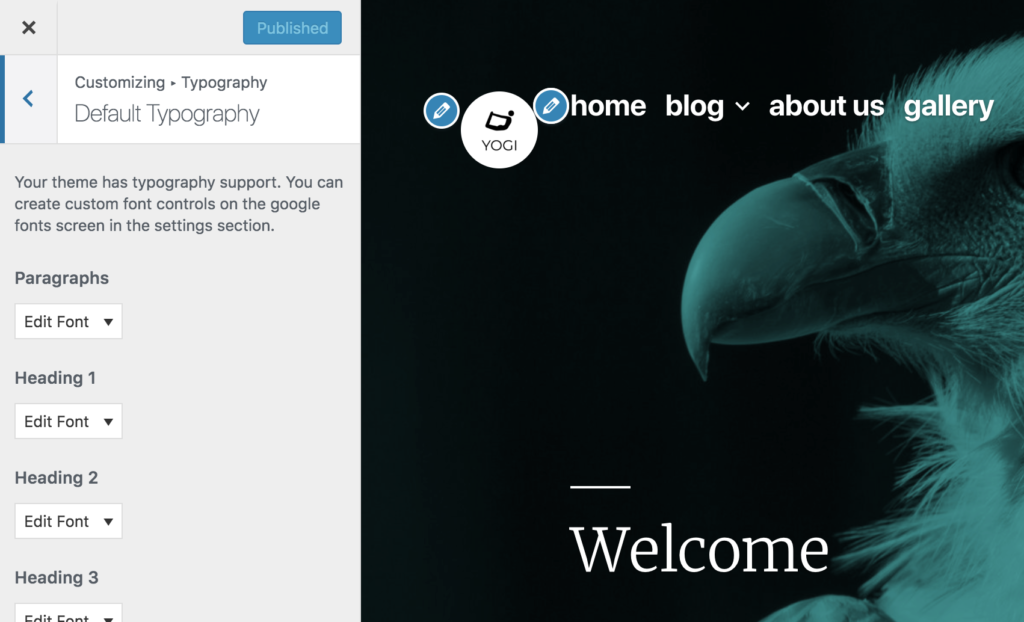
}How to change the fonts on the WordPress 2019 Theme
This last one is super easy.
All you have to do is install the free Easy Google Fonts plugin.
You can then change the fonts within the WordPress customizer. Click on customize / typography / default typography.
Leave a Reply