The way we create menus has completely changed with Full Site Editing (FSE) and this article will take you through step by step on how to manage WordPress menus when using a Block-Based Theme and the new Gutenberg Navigation Block. It is important to note that you’ll only have access to the new menu system if you are using a Full Site Editing theme.
The Classic Menu System
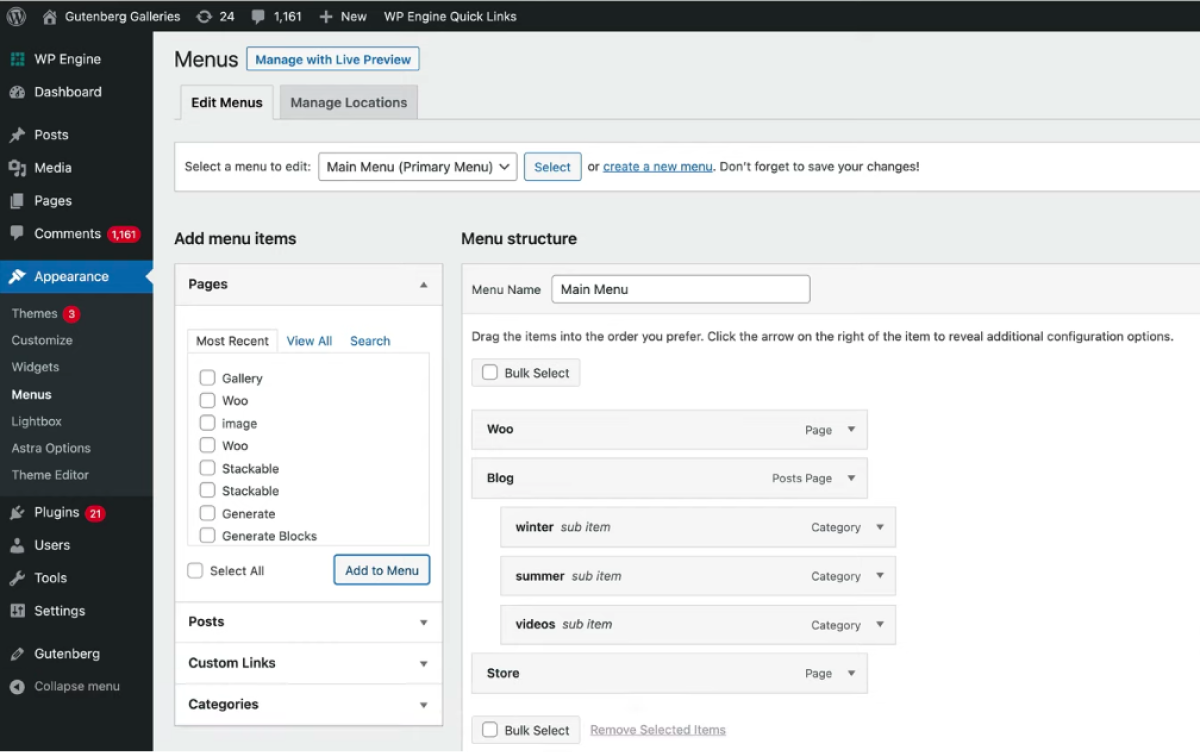
The picture above shows the old menu system layout. The Pages are on the left-hand side and can be added by clicking the Add to Menu button. They then appear over on the right, where you can change the order of them by dragging them either up or down (top to bottom equals left to right on your site). It’s simple to understand, but it’s abstracted from the actual website, so you won’t be able to see what they’ll look like until you’ve saved it and gone to the website.
Usage Examples
There are two possible scenarios, where you may need to create a menu in Full Site Editing using the navigation block:
- Adding an existing menu – for when you already have an existing website that’s been built using the classic menu system. You want to upgrade that site to FSE, and so you need to build that new menu using FSE
- Creating a new menu – where you have a brand new website and you want to create a brand new system using FSE
Adding an Existing Menu to a FSE Theme
This is the first scenario, where you’ve already built a menu system using the classic menu system, and you’ve activated a Full Site Editing theme.
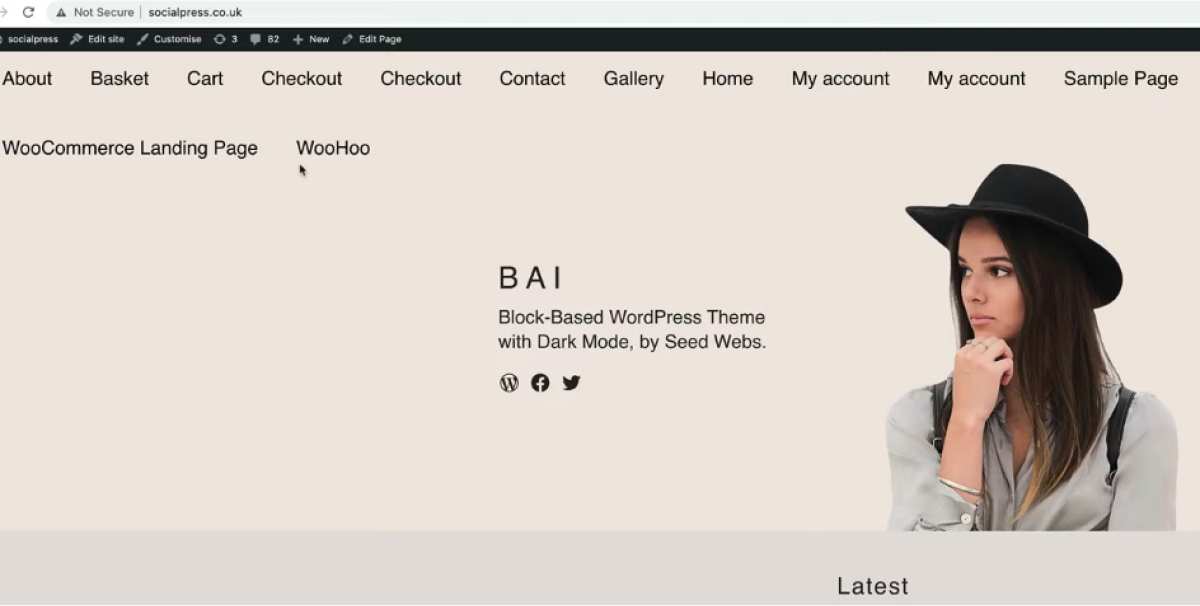
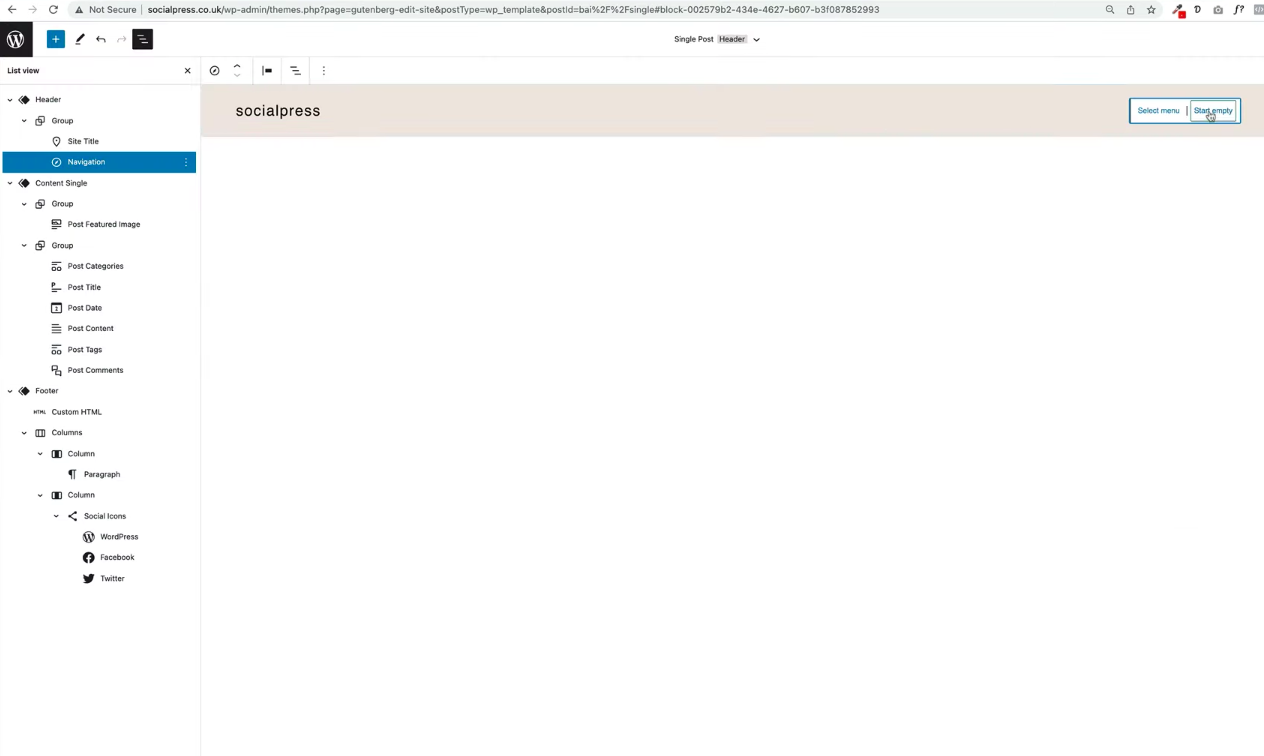
This example page shows the menu system in alphabetical order, however, there is talk about bringing those classic menus into a Full Site Editing theme. To be able to access the Full Site Editing mode (dashboard), you need to click Edit Site. Once that loads up, you need to click on the W in the top left, and you’ll see the options of Site, Templates, and Template Parts. You’ll want to select Template Parts, as this is where you’ll find the Header (which is where our navigation block will live). After selecting it, the Header will load onto the page and show a ghosted version of the menu system. While using the Navigation block, it is very helpful to keep using the List View extensively to view all your active blocks.
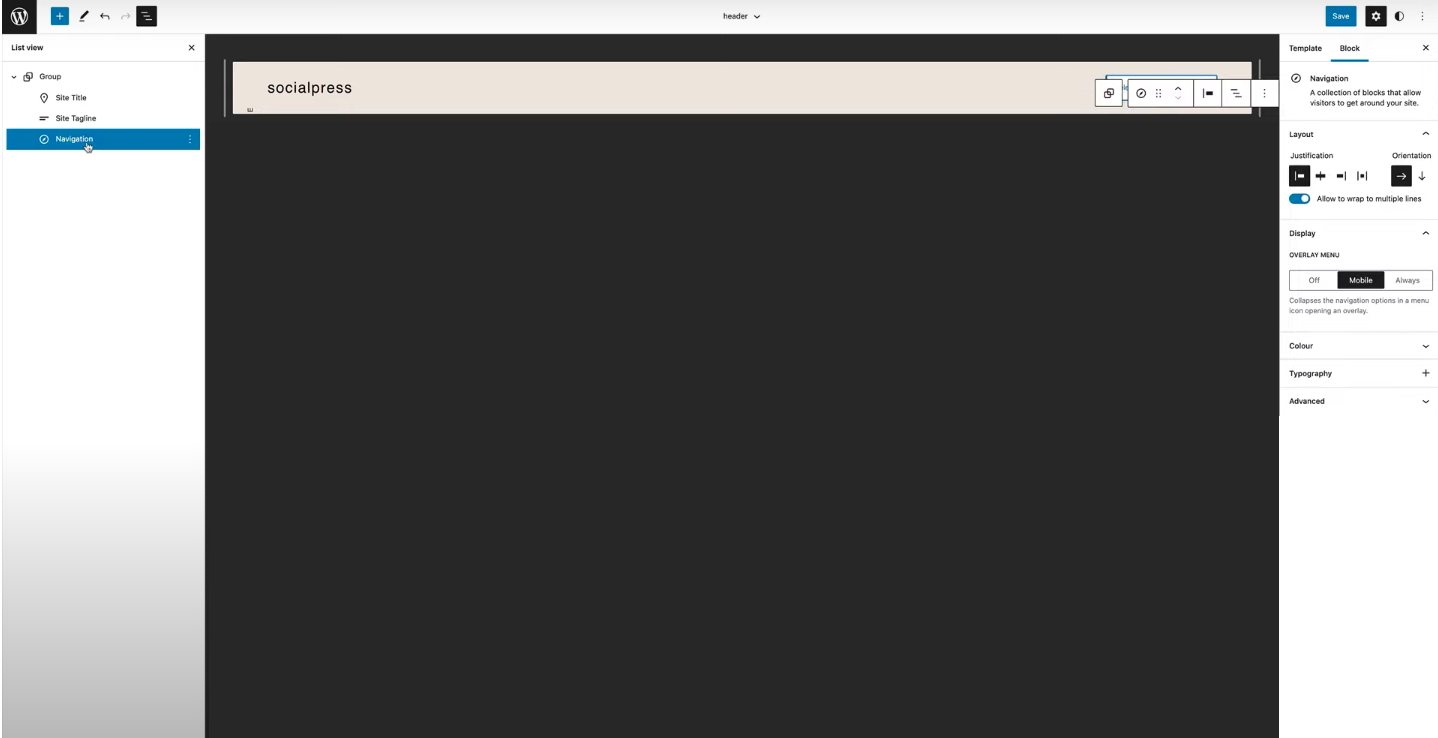
You’ll see in our example that we have a Site Title, Navigation, and Site Tagline. We want to edit the Navigation Block, so by clicking on it from the List View, it will open up a toolbar of options. The toolbar may be in the way of the Navigation block, so you may want to move it higher up. You can do this by clicking on the three dots in the top right corner of the page and selecting Top toolbar. This clears the toolbar so that it’s out of the way, making it much easier to work with.
Now you are faced with two options in the header. The two options are our two previous scenarios. You can start by selecting an existing menu, or you can start with an empty menu. We’re going to start with an existing menu, so if you click on Select menu, then it will show you a list of all the menus that you’ve already built. You’ll see that they’ll be listed here as classic menus.
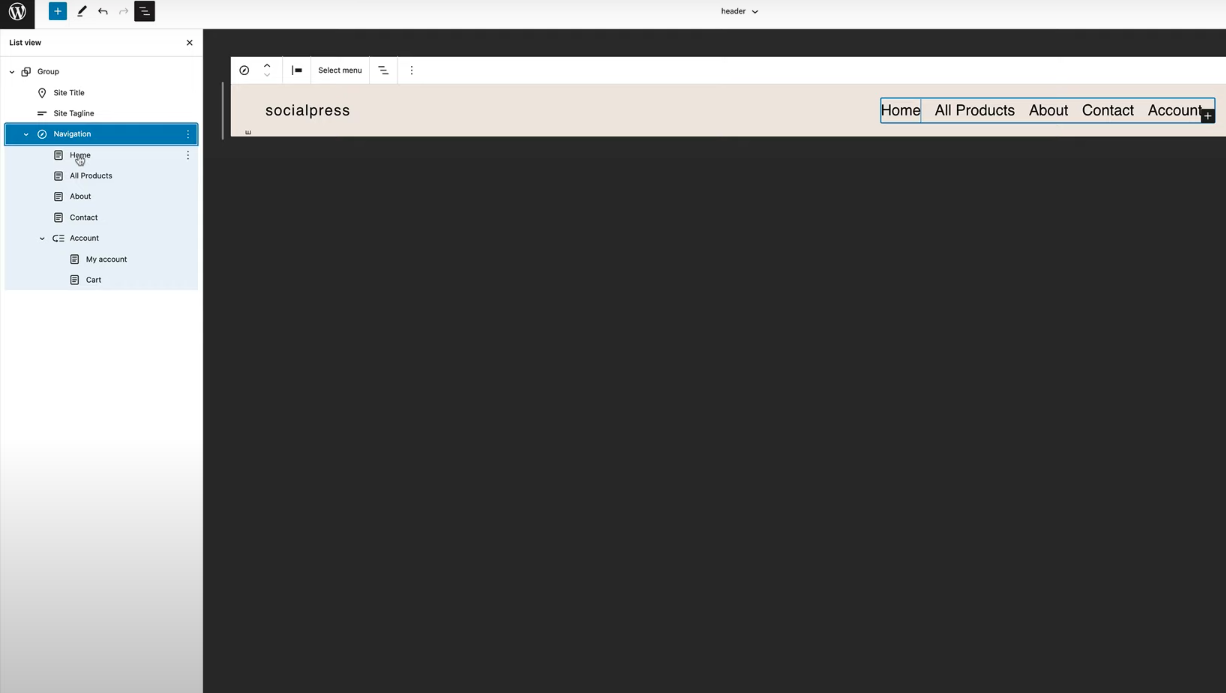
In this example, by clicking one of our pre-built classic menus called Primary Menu, it will bring that menu into the page. The List View on the left shows all the newly added blocks within the Navigation block. These added blocks are essentially pages that we are linking to. The blocks can be dragged and dropped to move them around, just by using the List View.
Creating a New Gutenberg Menu
This scenario will show you how to start with a brand new menu. A good idea for this option is to open your Pages in a new tab, so you can easily see which Pages you may want to add to your menu. This is because you can’t see a list of all your pages with the new menu system. However, if you know what the pages are, then you don’t need to do this. Now, if you go back to your menu on the editing site, and select Start Empty, this will start you with your blank menu.
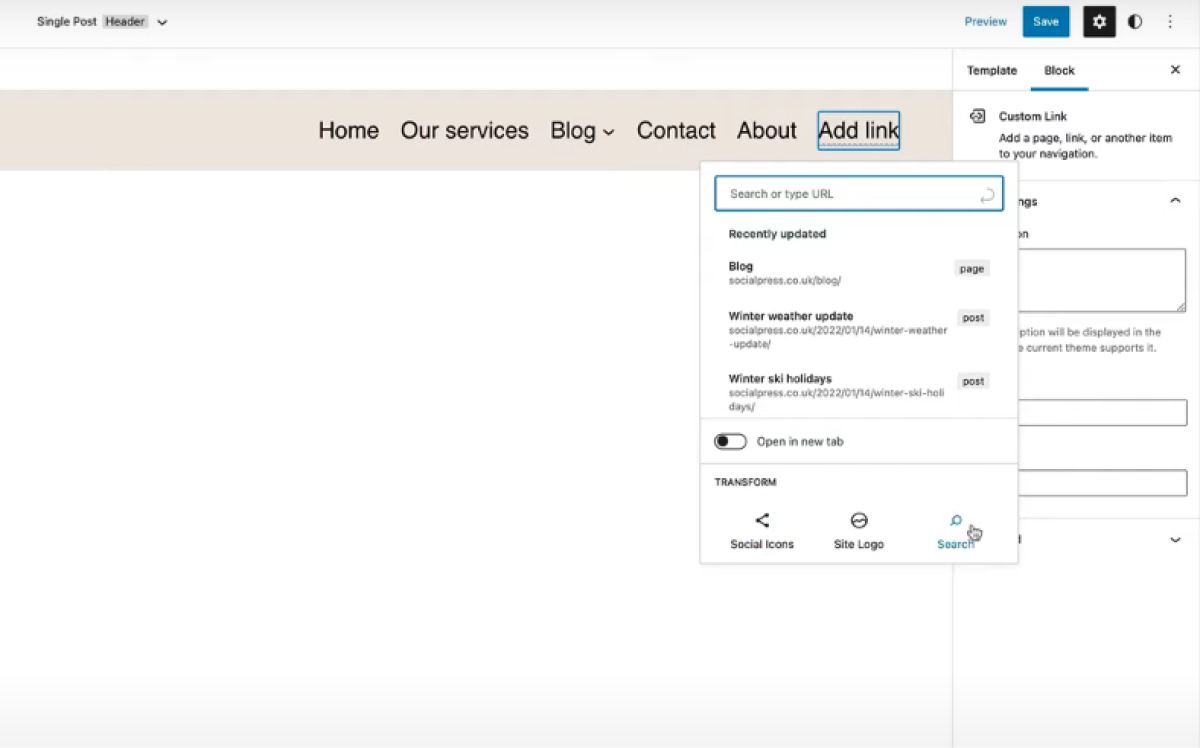
Click the plus sign in the menu to add a block and start your first menu item. The main blocks to start with are your pages (there will be other block options you can add, such as Search or Social Icons, but we will show you how to add them further on in the article). All you have to do is type the name of the page you want to add into the search bar. This will add a link to that specific page.
To add in another menu item, open up the List View. Here, you should see a Navigation block and your Page block. If you select your page block and press return on your keyboard, it will give you a placeholder to add your next Custom Link. You can keep adding in page links by pressing return, searching for the page title, and adding it from the dropdown.
How to Add a Sub Menu/Drop Down Menu to Gutenberg Navigation
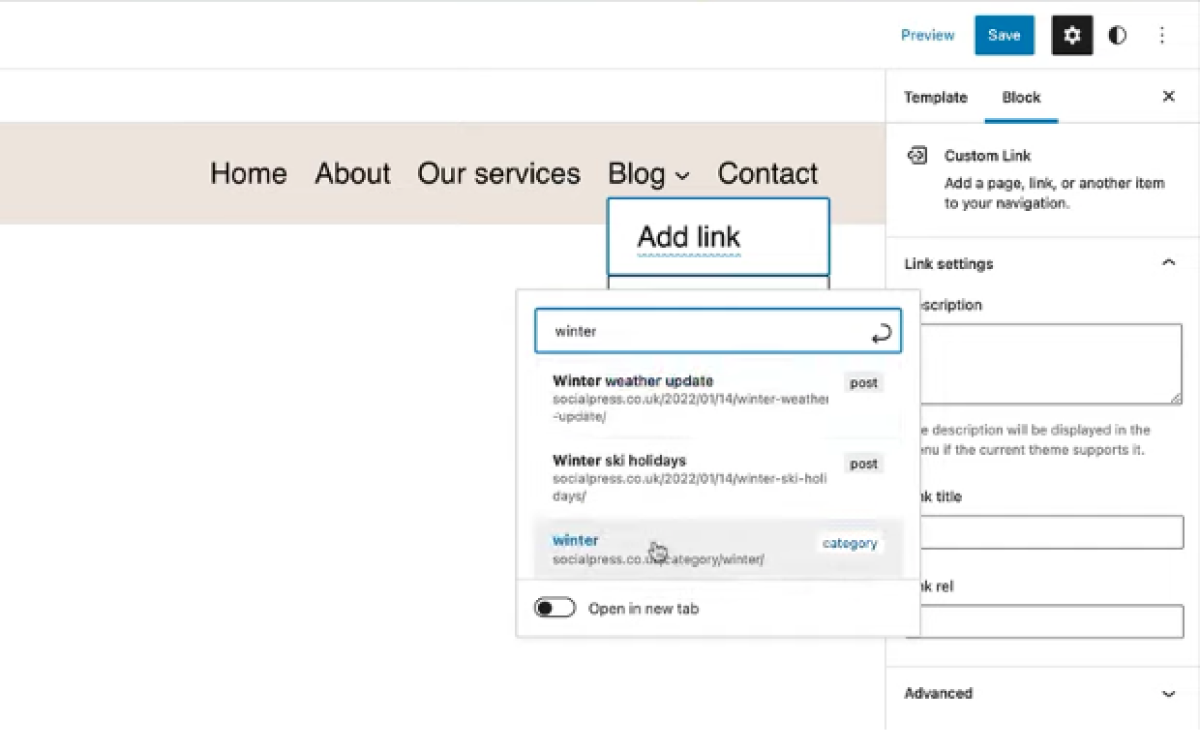
A drop-down menu can be made by adding in Post Categories underneath a menu item. Click onto one of the menu items itself, and you will see a small icon in the floating toolbar at the top of the page, called Add submenu. This will automatically add in a submenu placeholder so that you can now add in your blocks as you did before. You can type into the toolbar to search for specific page category links. By clicking the plus sign to add more links, you’ll also have several drop-down menus for each menu item.
How To Move or Remove a Menu Item
A menu item can be deleted by selecting it from the List View, clicking on the three vertical dots, and choosing to Remove it.
There are two ways to move a menu item from left to right. After clicking into one of the menu items, you can either:
- Use the toolbar at the top, by clicking the arrows to move it along
- Or use the List View to select a block and drag it to wherever you want
If you are keeping the List View open constantly when working in your menus, then the list view option may be easier for you to use.
How to Add Search to your menu
A search box or search icon can be added to your menu by selecting the menu item where you want it to appear and pressing Return on your keyboard. This will prepare a space for you to add your item. It will give you a drop-down menu of links to add. You should click the Search item at the bottom of the options.
This will add the search box to your menu. With this search box, you have several different options on how to use it:
- Adding an optional placeholder (so you can type words to show up in the search bar, for example, ‘search my site’)
- Adding a label
- Changing the position of the search icon button (outside, inside or no icon at all)
- Adding button text or a button icon
How to Add Social Icons to Your Menu
Again, using the List View is the easiest option. Click on the block where you want the Social Icons to appear afterward. Then hit Return. This prepares the ground for us to add our Social Icons. You can find the Social Icons block in the dropdown. After selecting it, you’ll see that it’s been added to the List View. Click the blue Plus Sign to add a social media block.
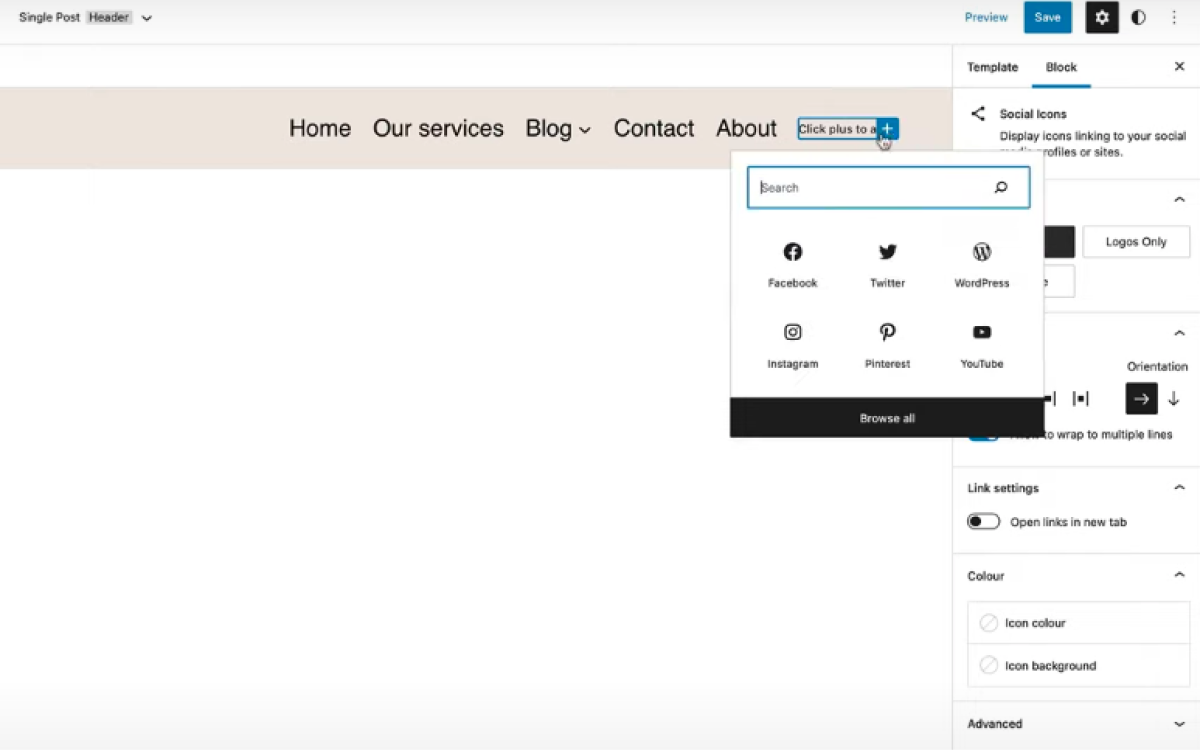
After you have chosen a social icon, for example, Twitter, you still need to add a link to your personal account. To do this, click on the icon and write in the full web link. If you wanted to add another social icon, you can use the List View to click on the Social Icons top-level block. This prepares the ground for you to add another icon. You can do this by once again clicking the Add Block plus sign.
How to Add Space Between Menu Items
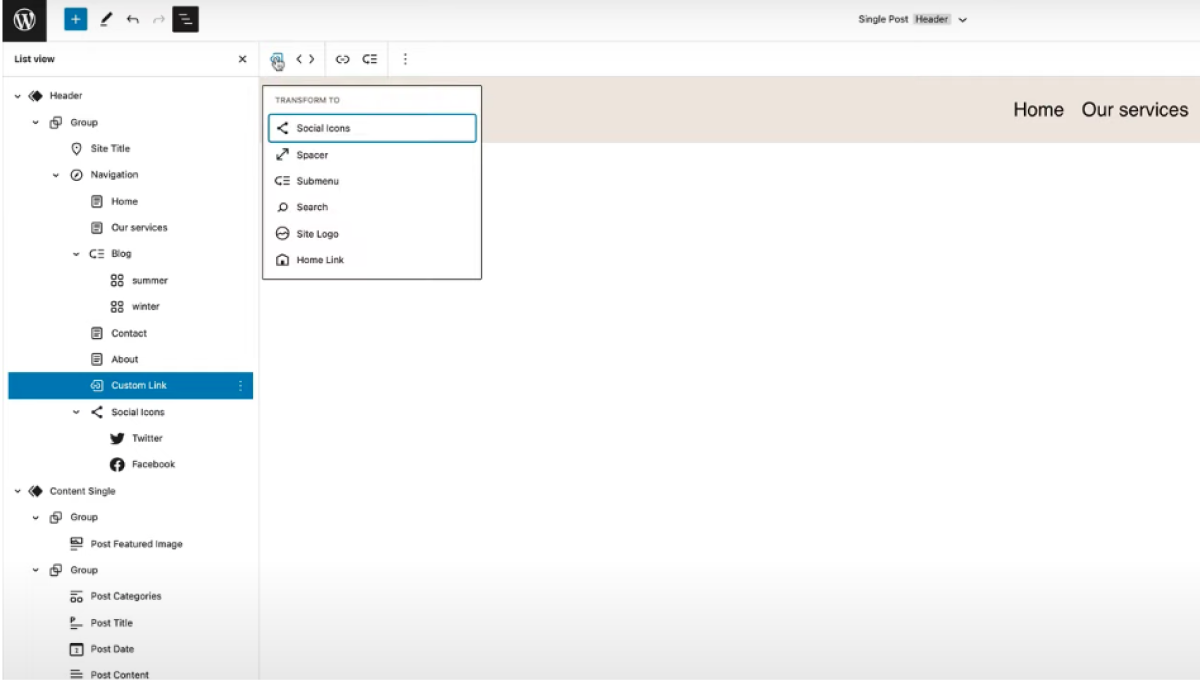
To add a space between menu items, you can add a special Spacer block. Select the menu item in our List View. Hit Return, which will add in the space for our custom link again. Above the menu, click the Custom Link button, which will change the type of block you are adding. One of the options is the Spacer block. Click on that and it will add the special kind of spacer block into the menu.
You can drag it out to make more space between our two menu items. You’ll also see on the right in the Block settings, that there is also a box to change the block width if you wanted to be more precise.
How to Add An Email or Phone Number to Menu
An email address or phone number can be added to your menu through custom links. First, select the block where you want it to appear and hit Return. In this search block, search for custom and you’ll see the option to add the custom link. What you need to do now is click on the small hyperlink in your toolbar.
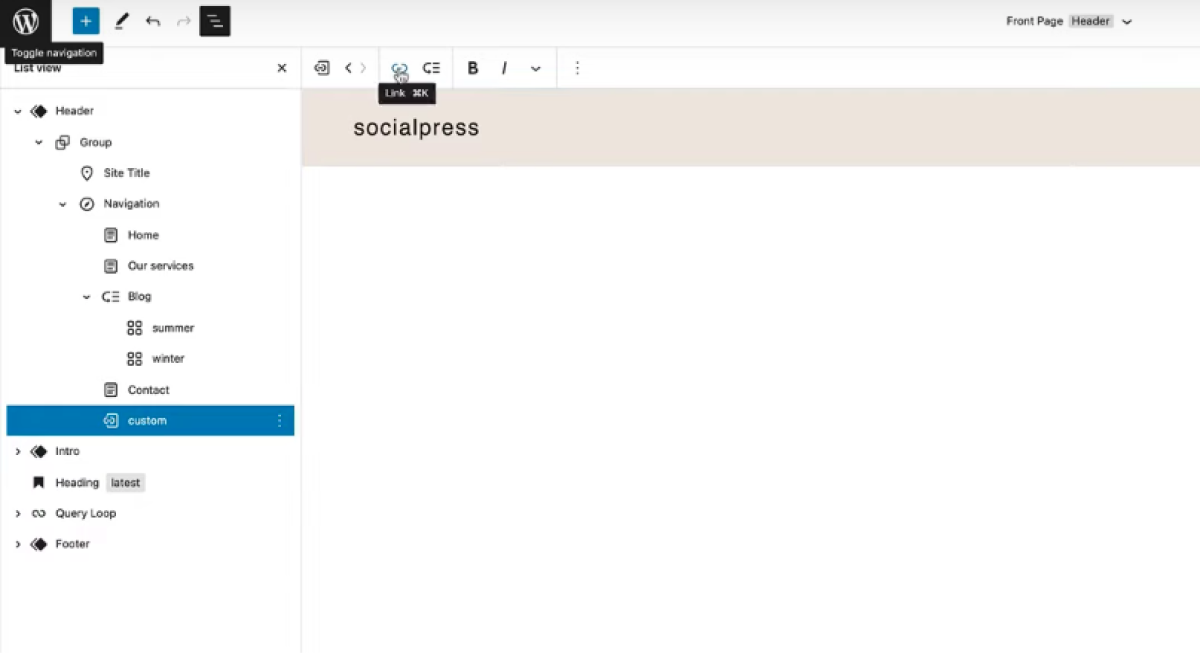
After selecting that you’ll have access to your custom link. Then click on the small pencil icon to change your text to write in your email, for example, and then write your email out into the URL as well. This will give you a custom link, linking to your email address. You can do the same thing for a phone number as well.
How to Design/Change The Text and Background Colours of Your Menu
To start with you must click on the Navigation block, the top-level block, from the List View. Otherwise, if you have selected one of the specific menu items, you won’t see any relevant menu item options. Selecting the Navigation block will give you a variety of options on the right side of the page, which include:
- Justification. This setting is dependant on the type of theme you are using, as it does not work with some themes. The position of the menu is fixed for some themes.
- Orientation. This allows the menu to either be vertical or horizontal.
- Overlay Menu. This involves your mobile menu options, where you can have it showing a mobile view.
- Submenus. This determines whether you want your submenus to open on click or to show the arrow.
- Colour. This setting lets you change the colours of your Text, Background, Submenu and overlay text/background.
- Typography. There are several options within this, such as Line height, Decoration, or Letter case.
Just be aware that some of these settings above may be theme-specific, so they may not work with some themes or the settings available may vary depending on the theme you are using.
Conclusion
Hopefully, this article has answered any questions you may have on how to use Full Site Editing menus and the Navigation block.
Leave a Reply