I was reading a post by Chris Lema last week – and btw you should definitely read his blog – called Building Landing Pages with the Block Editor (Gutenberg).
It’s cool because it shows you how to create a Call To Action Box (CTA) with the block editor using the GenerateBlocks plugin.
A call to action or a CTA is a written directive used in marketing campaigns. It helps encourage website visitors to take a desired action.
However, there’s an easy way to create a call-to-action box without any plugins just using the core Gutenberg Blocks – and this is what I’m going to show you in this tutorial.
There are actually three ways to build ‘call to action boxes’ with Gutenberg. Which route you take will depend on the finished design you would like to achieve.
Here are the three designs I’m going to show you how to build.
Design #1 – Built using the Columns Block

Design #2 – Built using the Cover Block
One advantage of using the Cover Block is that you can add an image or video as a background to the whole section.

Design #3- Built using the Media and Text Block
This design is great if you want a photo to fill an entire column.
All three designs utilize Container Blocks.
Container Blocks are especially useful in the Gutenberg Block Editor because they allow us to nest Blocks within other Blocks.
In our case, we are going to use the Columns Block, the Cover Block, and the Media and Block. These are all standard Gutenberg Blocks that require no extra plugins.
Let’s get to it.
Video tutorial
And here’s step-by-step instructions.
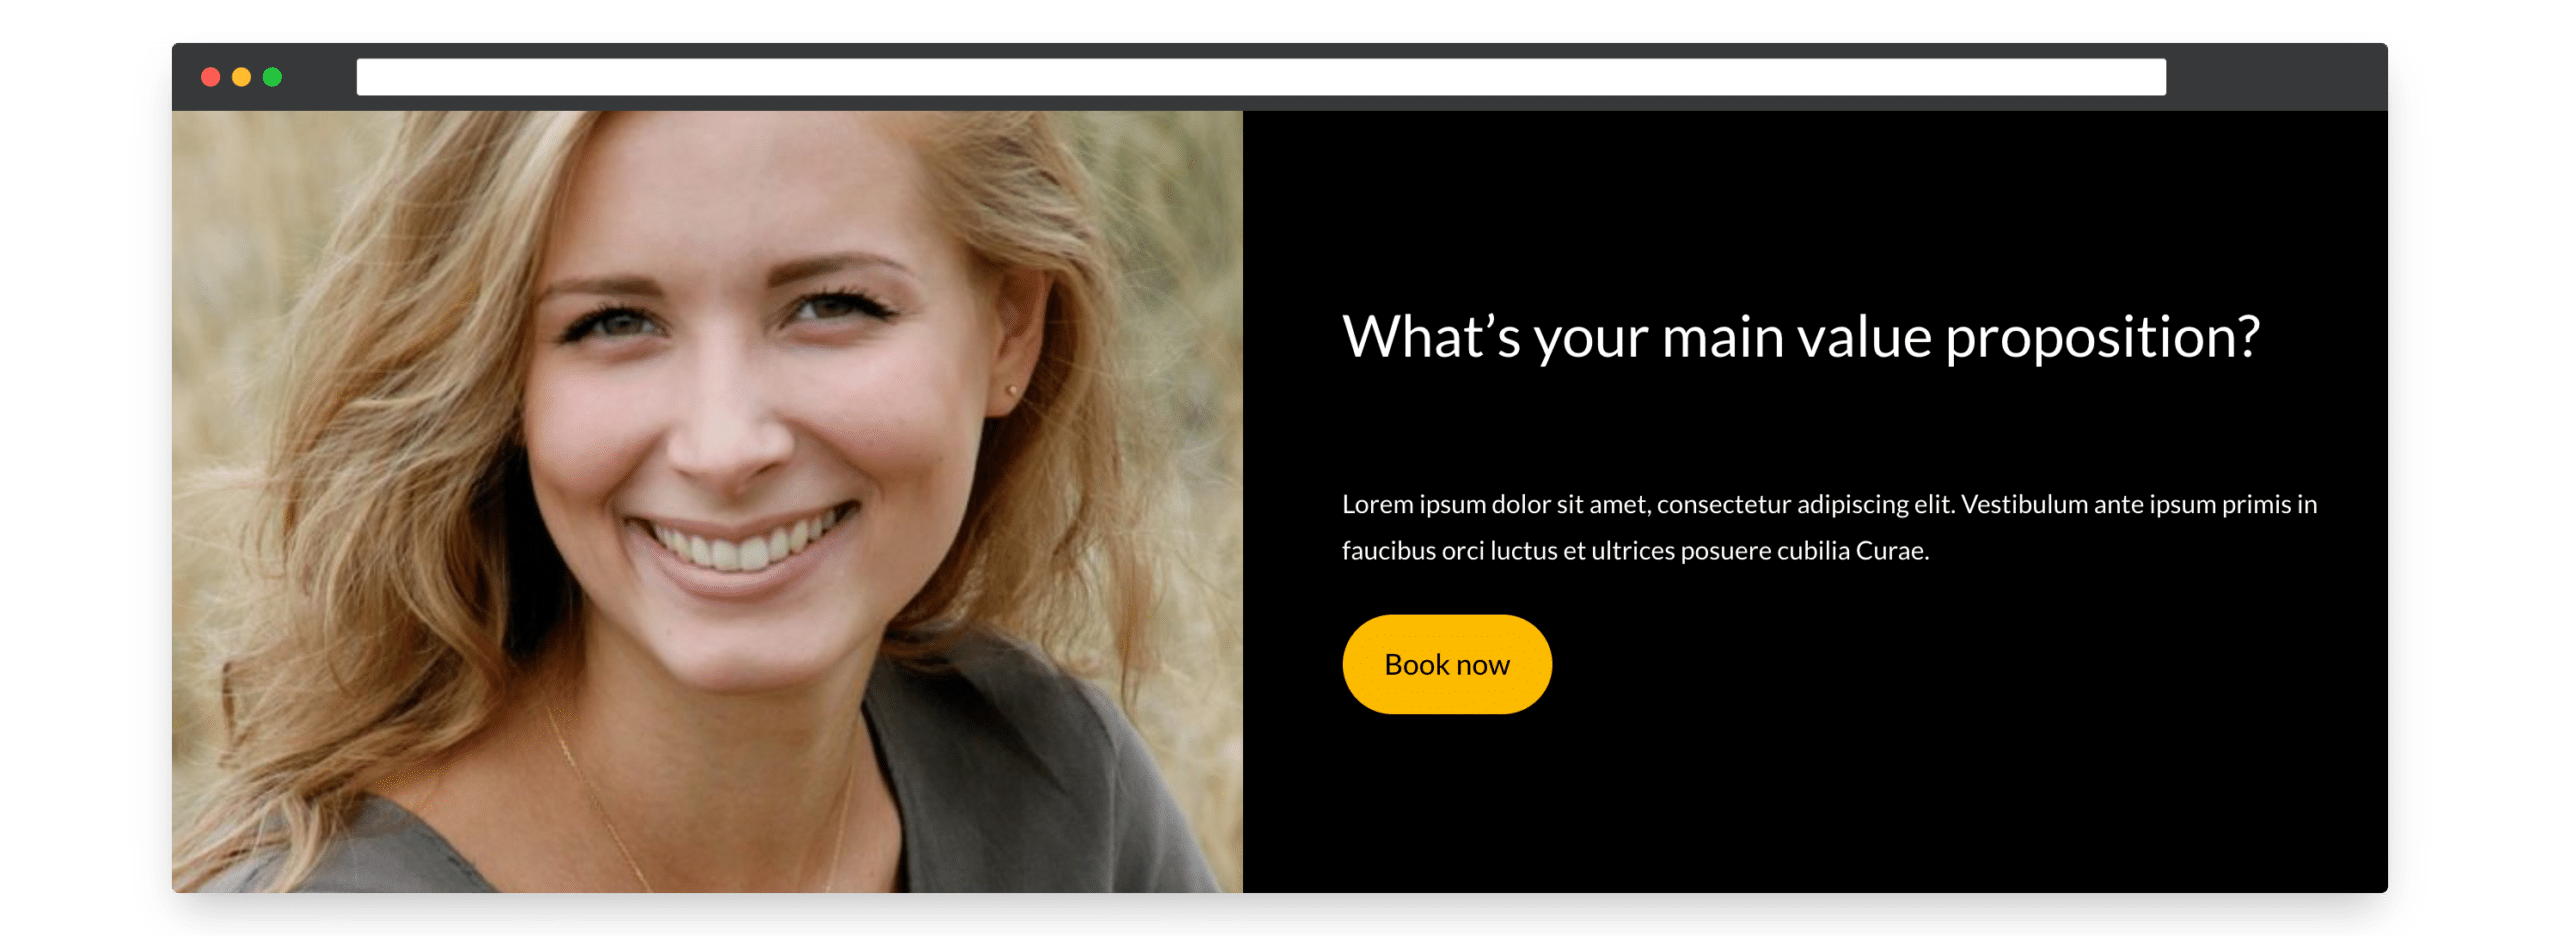
How to create a CTA box with the Gutenberg Columns Block
CTA Box created with the Gutenberg Block Editor and the Columns Block
To achieve the layout above we make use of the Columns Block.
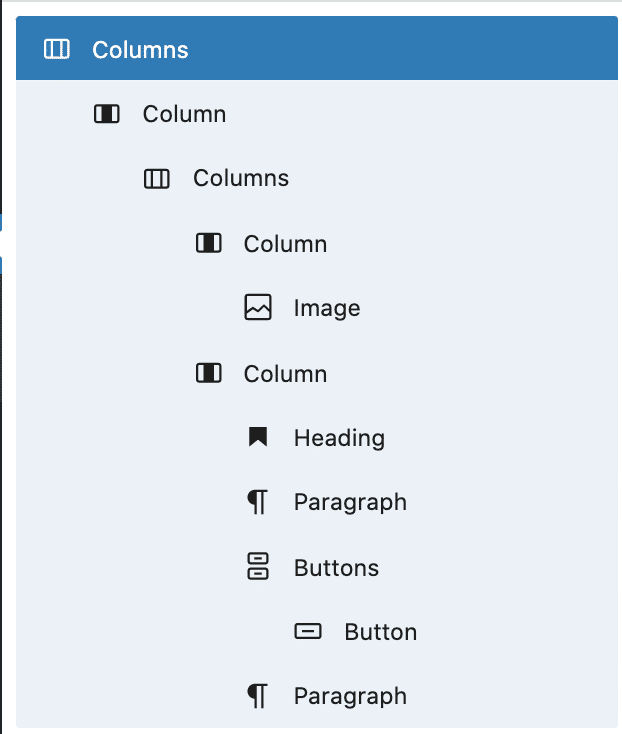
First, we add a 1 column layout, and then within that layout, we add a two Column Layout.
This gives us the basic structure and layout we need.
The reason we add the 1 Column first is so we can add a background colour to the whole section and also add some space between the blocks and the container (padding).
To build the Call to Action Box above just use the following Gutenberg Blocks.
You might want to add some padding around the Blocks contained within the Columns Block container, but don’t worry we just need a little CSS and this is very straightforward.
How to add CSS Padding to the Gutenberg Columns Block
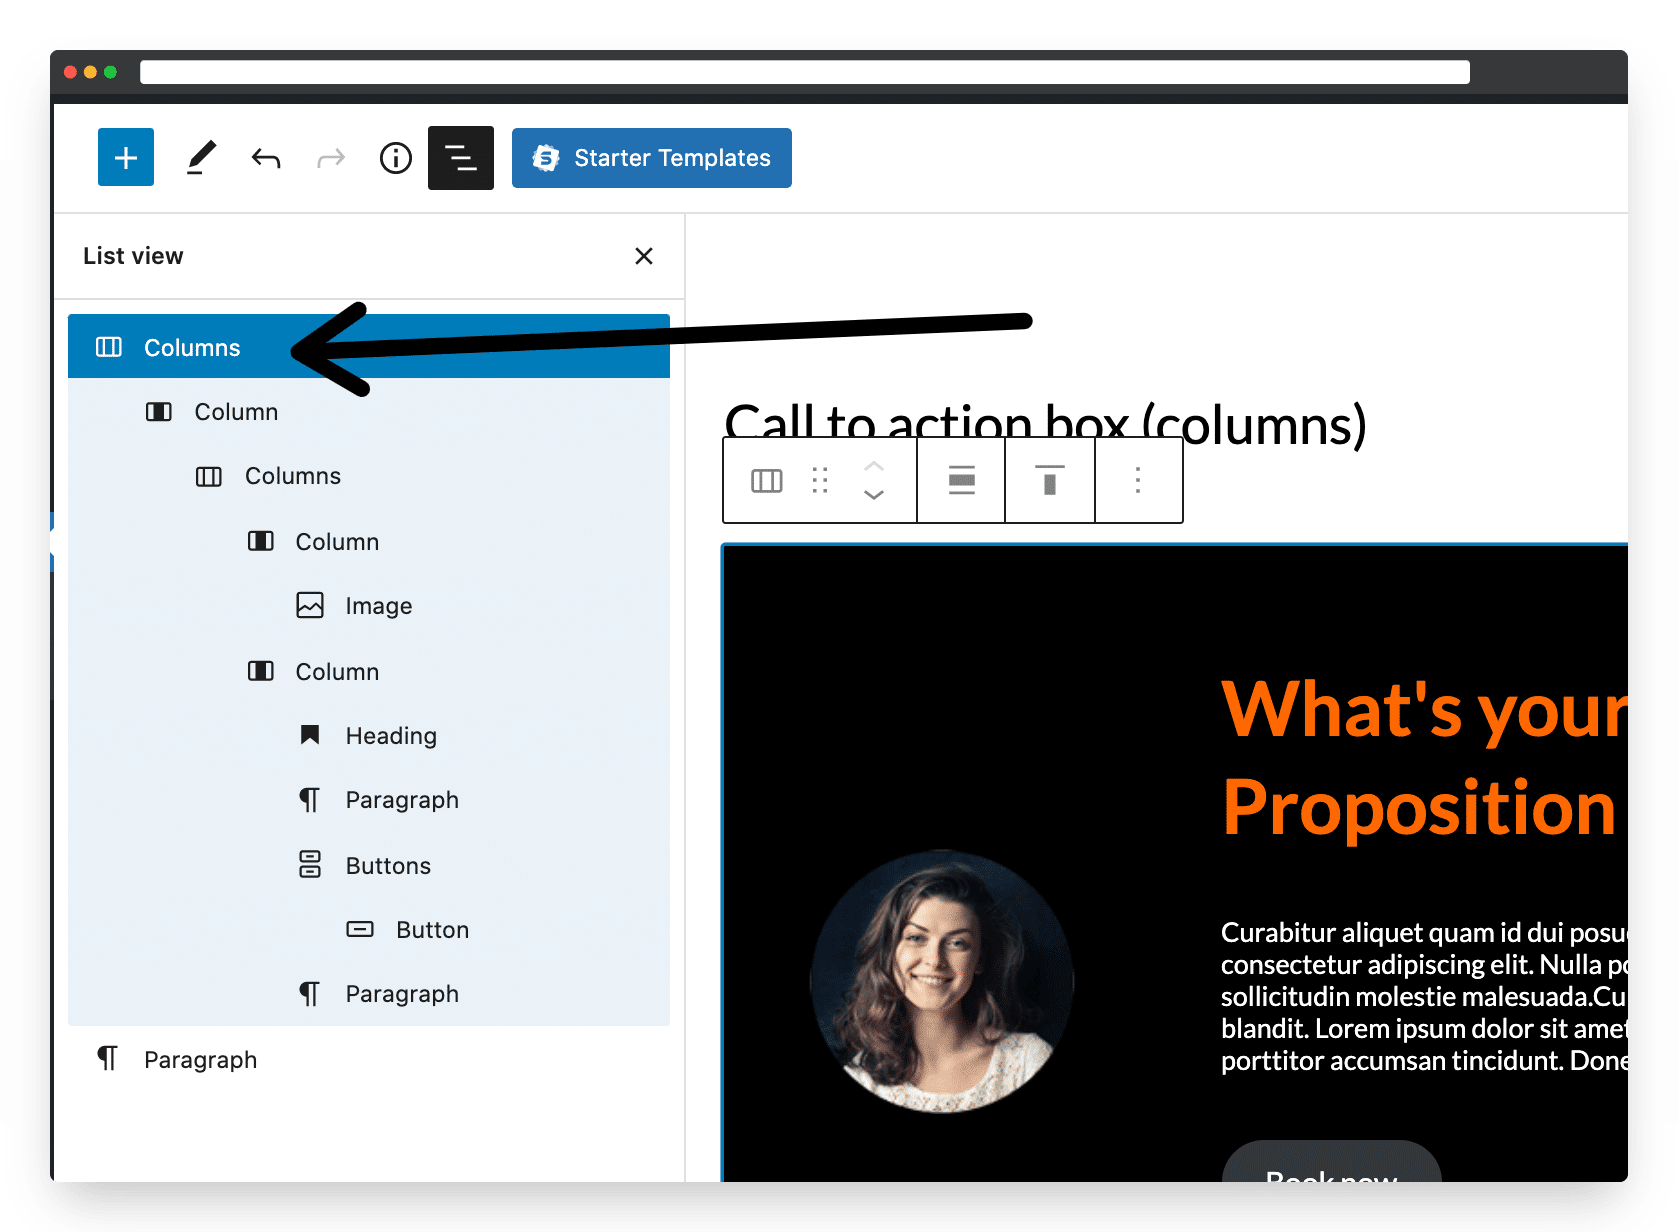
Step 1 – Select the top-level Columns Block
Use the List view to make sure you select the top-level Columns Block
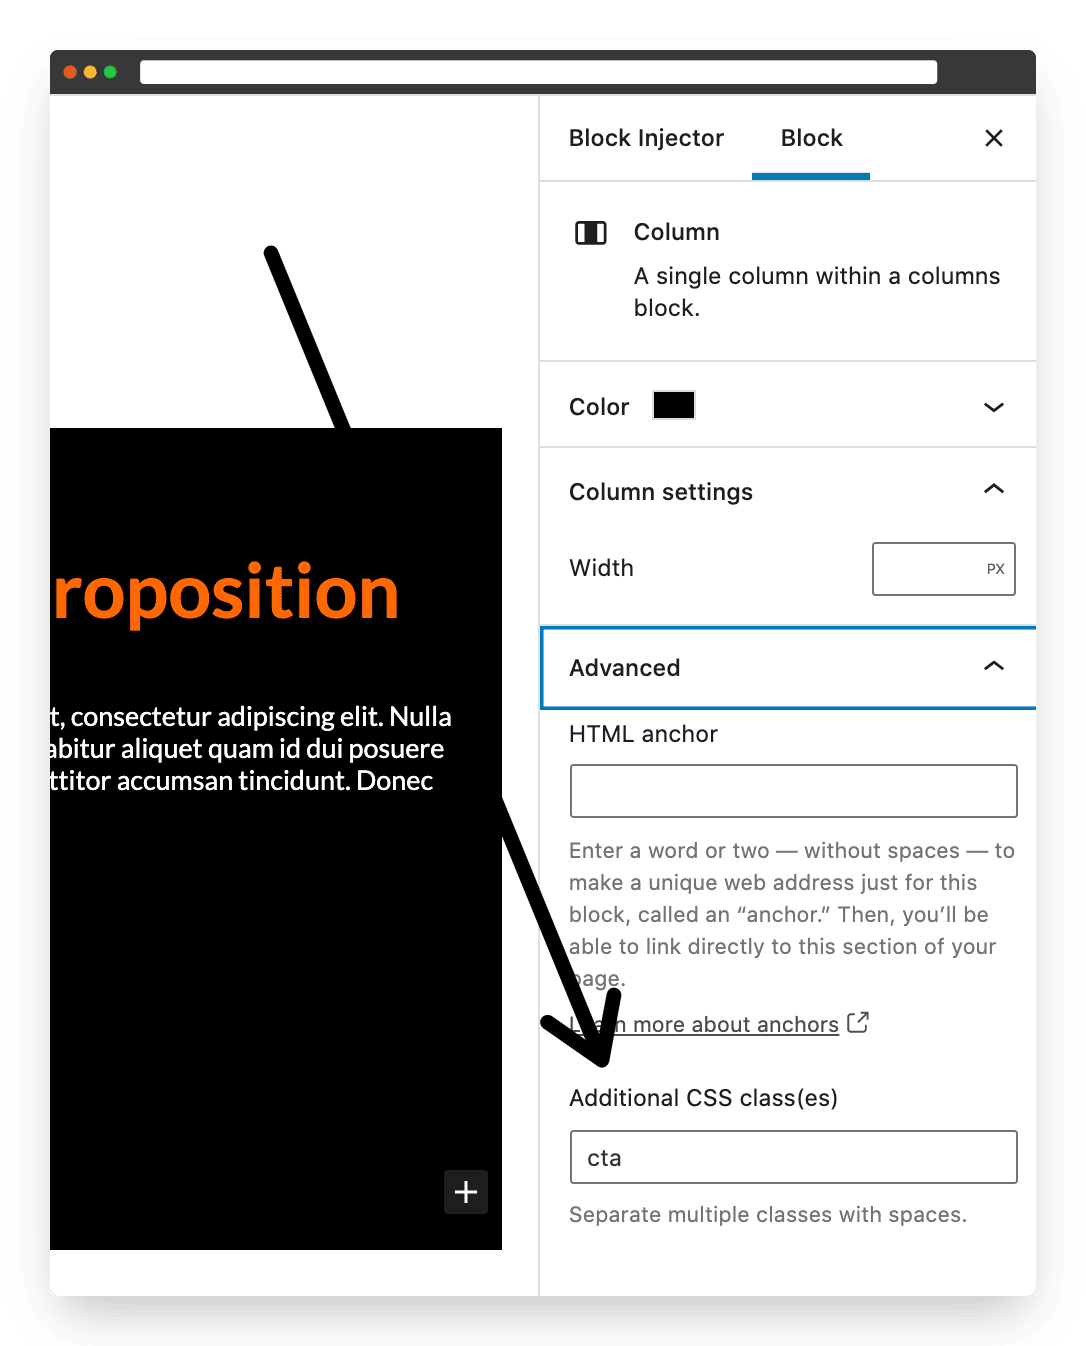
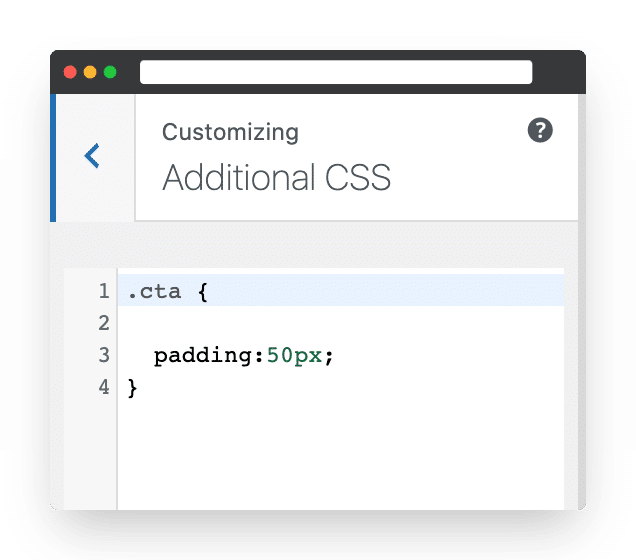
Step 2 – Add the CSS class
In the Block Panel add your CSS class.
In my case I used cta
STEP 3 – Add the CSS to the WordPress customizer
Go to Customize / Additional CSS and add the following CSS.
Change the Padding size to whatever looks good to you 🙂
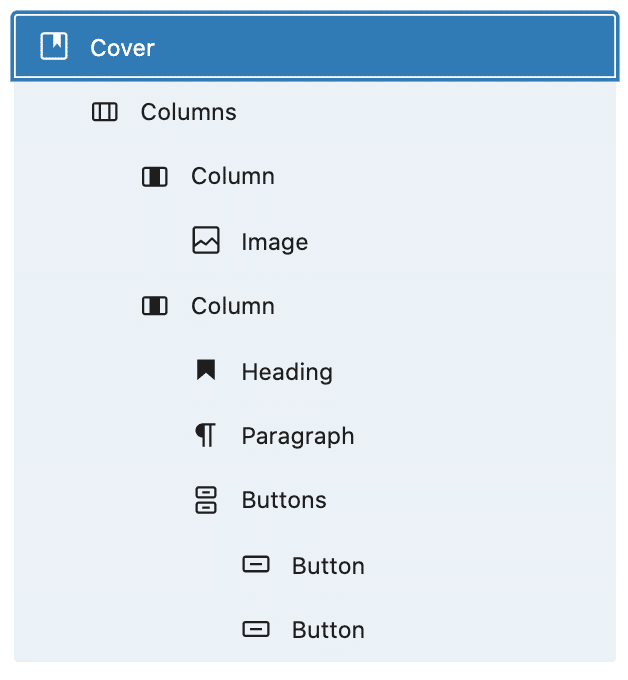
How to create a CTA Box using the Gutenberg Cover Block
CTA Box created with the Gutenberg Block Editor and the Cover Block
Using the Cover Block might actually be the easiest way to build a CTA Box with Gutenberg because it has a few in-built features that will help.
- Inbuilt support for background pictures and video
- Padding gets added automatically
Here are the Blocks we use to build the layout above.
First, we add the Cover Block, then we add a Column Block within it. This gives us our basic structure.
How to create a CTA box using the Gutenberg Media and Text Block
CTA Box created with the Gutenberg Block Editor and the Media and Text Block
To achieve the layout above we use the Media and Text Block.
- Add the Media and Text Block
- Add your photo
- Change the text in the right hand column
- Add the buttons block (and change colour)
- Select a background colour (make sure to select the top level media and text block)
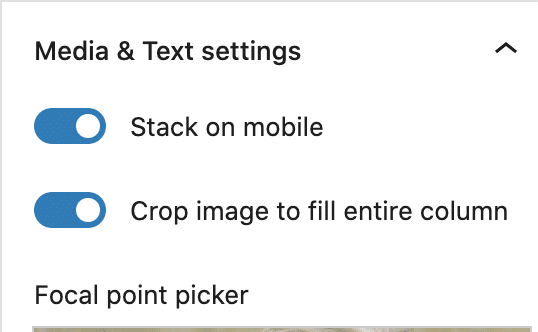
- Select ‘crop image to fill entire column’ in the Block Customizer panel
Important note: Make sure to turn on ‘crop image to fill entire column’ in the Block Customizer Panel (see below).
Here’s the basic structure that we need.

How to dynamically display your Call to Action Boxes anywhere in your website!
Now we have some cool looking Call to Action Boxes the next step is to display them within our sites.
There are three ways you could do this
- Build it from scatch each time – no thank you
- Save it as a resusable block and then go into each page or post to insert – better but still time very consuming
- Use our upcoming Block Injector Plugin to dynamically inject your Call to Action Box anywhere within your website – that sounds amazing…ok it’s not released yet but it will be soon, I promise!
Here’s a preview of the Block Injector Plugin
I’m planning to have this released in the first week of September 2021.
Conclusion
Call to Action Boxes can make a huge difference to your conversions and hopefully you’ll now be able to create them simply, quickly, and with no plugins (well apart from our Block Injector plugin if you want to dynamically display them).
If you have any questions, please feel free to post them in the comments below.
thanks for taking the time to pootle 🙂
jamie
p.s WooCommerce.com has just written this useful article on Top 10 tips on Creating an Effective Call to Action which is worth checking out.
Leave a Reply