WooCommerce is one of the most enduringly popular WordPress plugins, thanks to its powerful functionality and compatibility with all kinds of online retail. So it’s no secret that there are lots of WooCommerce stores out there.
With customers having a lot of different options to choose from for any given purchase, WooCommerce store owners need to find new ways to put their store in the spotlight. By creating a unique brand and customising your online store to fit your unique brand style, you can make your store stand out from the crowd and differentiate yourself from the competition. This involves creating attractive sales campaigns that will boost conversions and nudge customers to purchase your products.
A great way to help you get the most out of your sales campaigns is to add a WooCommerce countdown timer to your store. All you have to do is display a virtual clock on your online store that counts down from a certain date and time. This countdown will indicate in real time the start and end (or remaining time left) for the event or the offer.
Start your 14 day free trial of Storefront Blocks
Customise the WooCommerce Shop Page and Category Pages with our Premium WooCommerce Blocks.
A sales countdown timer can help create a sense of urgency and a fear of missing out for customers to buy your product before the end date. This can compel visitors to place orders immediately while they’re still on your WooCommerce store, rather than leaving and forgetting about their order. In this way, it motivates customers to make quicker purchase decisions.
In this article, we’ll show you how you can use a WooCommerce sales countdown timer to create urgency, improve your conversion rate, and drive more sales.
Let’s put everything into context before we begin.
When Should You Use a WooCommerce Sales Countdown Timer?
Adding a sales countdown timer to your WooCommerce store is a great way to highlight specific products. This can also help you give a decent boost to your sales campaign as it increases product visibility and encourages more customers to buy from you. Using a sales countdown timer can also help you grow your business’s bottom line.
Knowing which products you want to push and the type of offer you’d want to run is important. In fact, it plays a huge role in making your sales countdown timer effective and creating the urgency that’s needed to push customers to purchase from you.
Let’s take a look at a few examples of when to use a WooCommerce sales countdown timer on your online store:
Flash Sales
Flash Sales are sales on products you put up for a specified period of time. For example, it could be for 24 hours or for the next 10 days.
You can use a WooCommerce sales countdown timer to promote products that sell out really quickly or products that have high demand. These products might include trendy fashion items such as bracelets, rings, or bands. You can also include in-demand electronic products such as headphones, charger cables, or screen protectors. Additionally, flash sales work great for apparel including t-shirts, hoodies, and jeans.
Special Promotions
Special promotions are offers or discounts on products you put up for a limited time only. These can include new or introductory product offerings. For instance, you can offer discounts on a new product to motivate customers to try it out. Additionally, you can also include one-time special offers such as Buy one get one free or offer free shipping on orders above a certain amount. You can also create a sense of excitement for new product release with a “coming soon!” timer.
You can also use special promotions for old products when you release a new, updated version. For example, if you already have a best-selling dutch oven and have created a new product that’s an improvement on the old design, you could offer a special promotion on the older design.
Holiday Sales
Holiday sales can be used as an opportunity to display a WooCommerce sales countdown timer on your online store. You can put up products that best fit the occasion.
For instance, for Valentine’s Day, you can feature products such as chocolates, scented candles, and cards as a part of the sale. Similarly, for Independence Day you can provide customers with things such as flags, stickers, and merchandise.
You can also use holiday sales to put up products that are high in demand during that specific holiday season. For example, for Thanksgiving people like to buy a lot of meat prepping tenderisers, seasoning, and carving knives.
Put simply, adding a sales countdown timer is a great way to highlight your offer and boost your sales campaign.
How To Add a Sales Countdown to your WooCommerce Store
Before we jump into adding a sales countdown timer to your WooCommerce store, it’s important to note that there are two different types of sales you can offer. You can either have sales on individual products or on the entire store (or selected category pages).
For this tutorial, we’ll assume you have the WooCommerce plugin installed and set up on your website.
#1: How to add a sales countdown to individual product pages using the WooBuilder Blocks plugin
Here, we’ll show you how you can add a sales countdown to individual product pages using the WooBuilder Blocks plugin.
If you haven’t done so already, get the WooBuilder Blocks plugin and install it on your WordPress site.
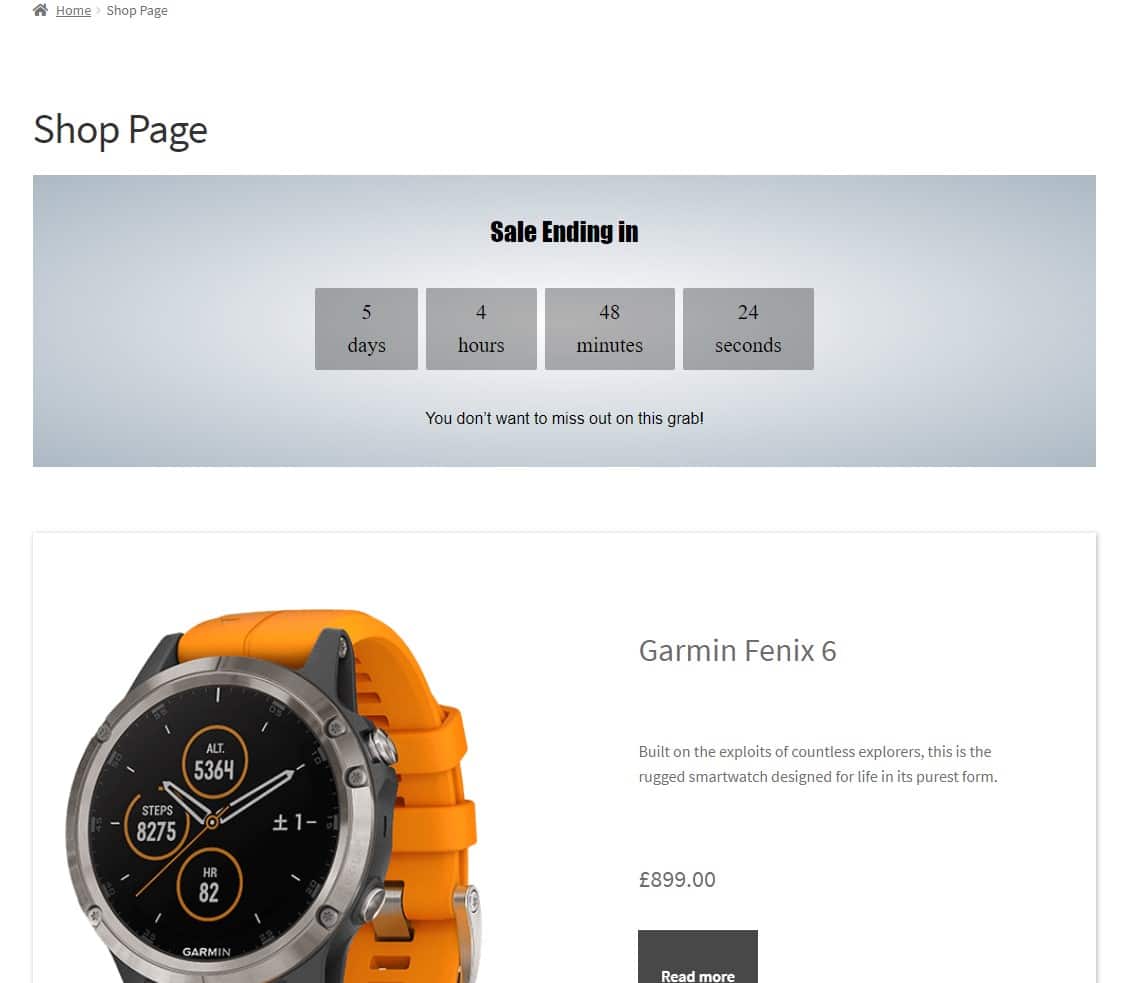
Once that’s done, head over to WooCommerce → Products → Edit Product from the WordPress admin panel. You’ll notice that the WooBuilder Blocks plugin lets you build product pages just like you would with any new WordPress page using the Gutenberg block editor and many different WooCommerce-enabled blocks.
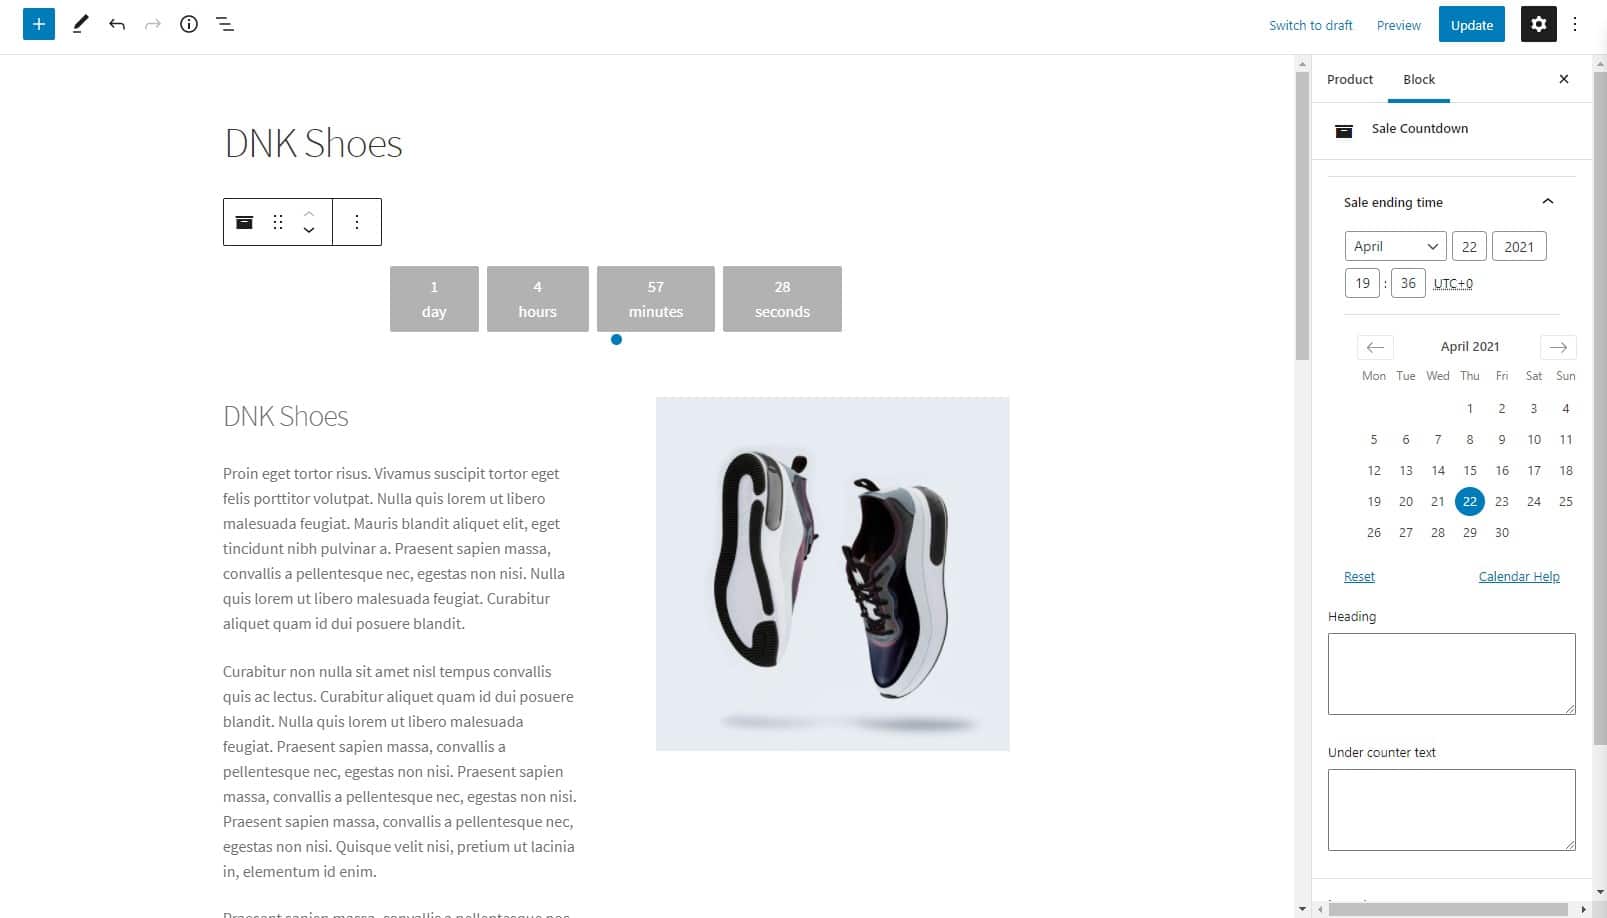
The next step is to add a Sales Countdown block to the page. To configure the block, set the sale ending time. By doing this, your countdown timer will automatically appear on the front end of your website. It will look something like this on the front-end:
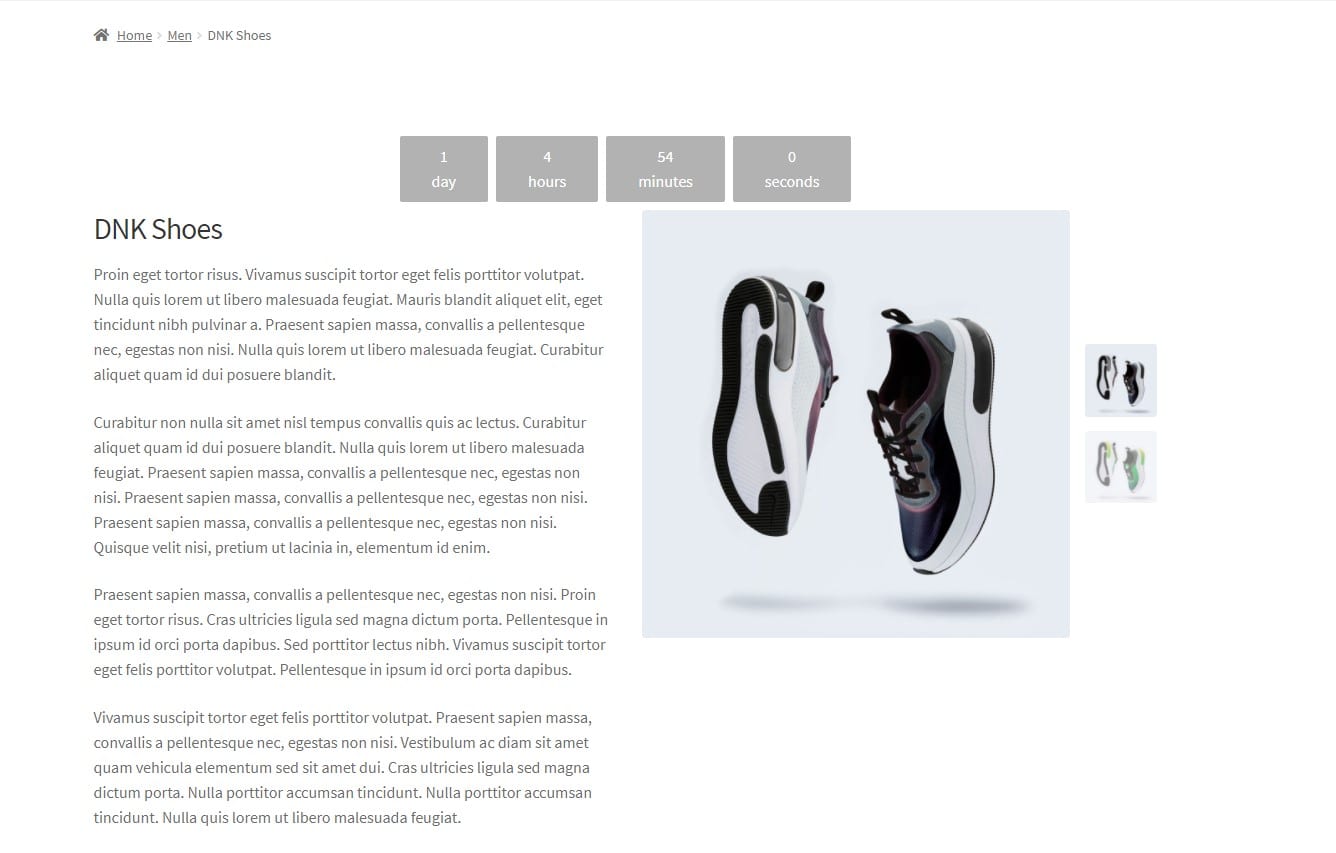
Customers can simply add the product to their cart and proceed to the checkout page.
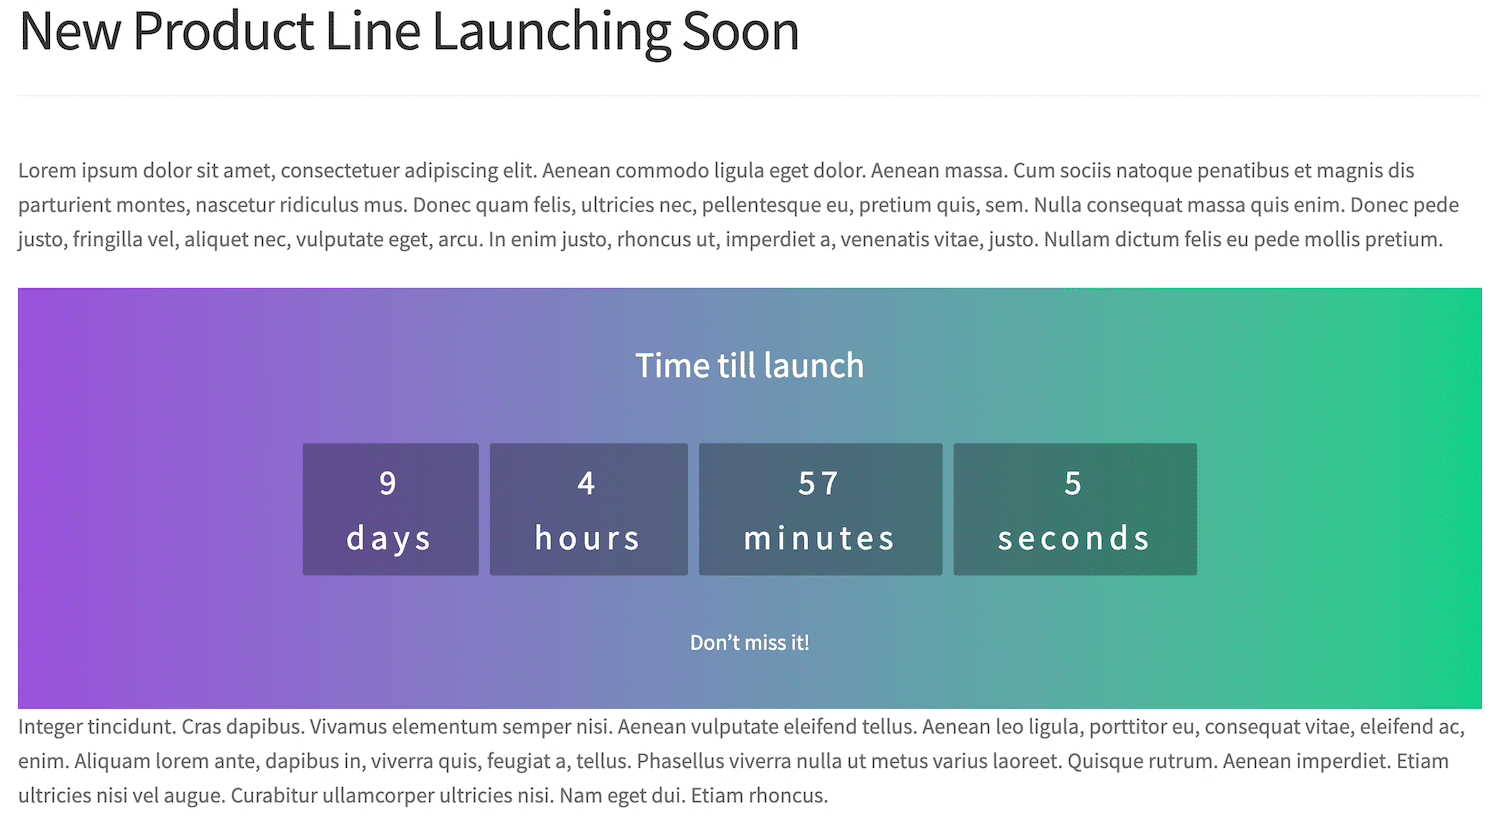
Customising your WooCommerce sales countdown timer
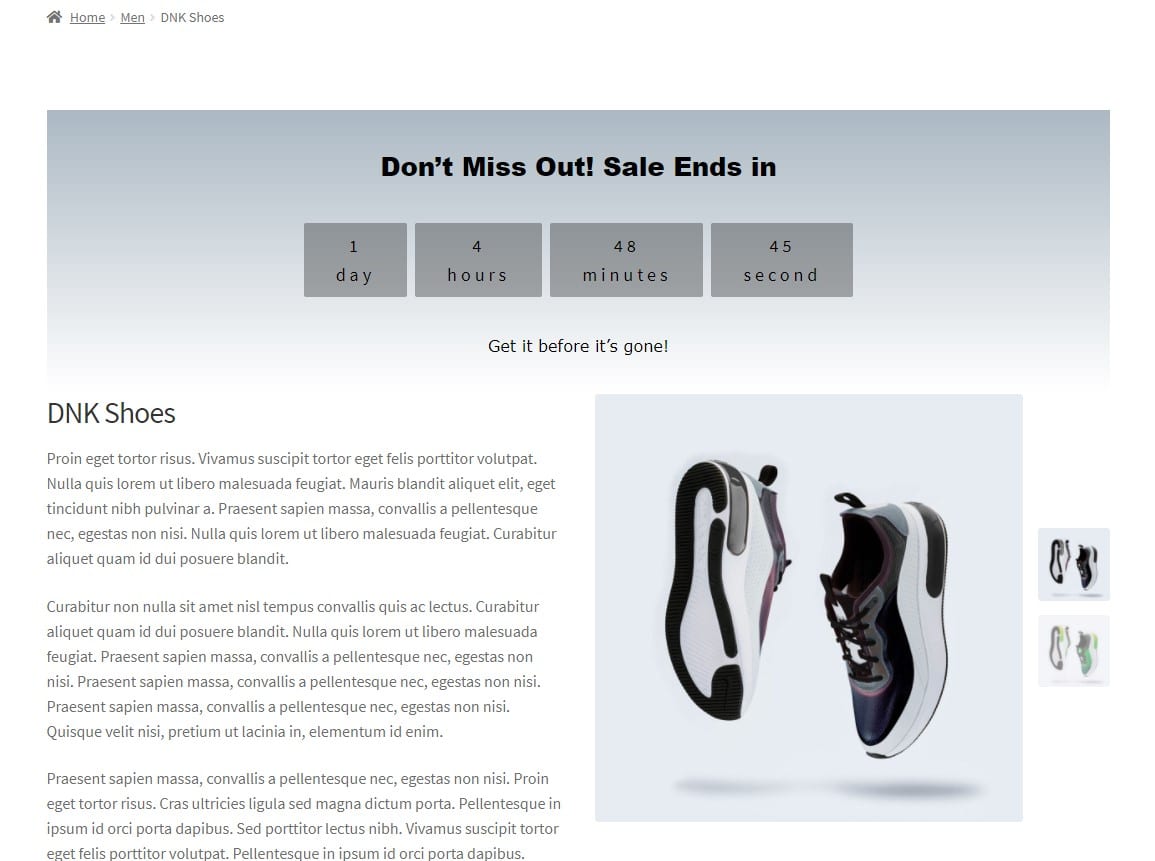
Now that you’ve created a WooCommerce sales countdown timer, you can start customising it to match your brand’s unique style.
Customising your Sales Countdown block is key in making your store stand out from the rest of the crowd. Here are some actionable tips to help you customise your WooCommerce sales countdown timer style:
- Use the Heading and Under Counter options to edit the text above the block. For example, you can write Sale ends in… to build context. Or, for more urgency, you could write something like Don’t Miss out! Sale ends in … or Get it before it’s gone! Deal runs out in ….
- Use different fonts, font sizes, letter spacing, and colors to customise the look of your Sales Countdown block.
- Use a background image or change the background color or gradient to add some personality to your countdown timer.
- Change the minimum height of the block to make it bigger or smaller on the front end of your WooCommerce store.
Here’s an example of what your countdown timer could look like after you’ve customised it:
Unlike most sales countdown plugins out there, WooBuilder Blocks offers so much more than just a countdown timer plugin. Generic WooCommerce stores and products are a thing of the past with WooBuilder Blocks. Now, you can fully design and customise the whole WooCommerce product page any way you like using the Gutenberg Block editor. You also get a wide variety of different blocks that include:
- Product title
- Product image
- Product price
- Add to cart
- Short description
- Product reviews
- Related products
- Product tabs
- Product carousel block
- Request quote
Additionally, you can also create templates and apply them to multiple WooCommerce products. This not only saves you time and hassle but also ensures all of your Sales Countdown blocks look exactly how you want them to. You can also use third-party Gutenberg blocks within the single product layout to get the exact look and feel you want. There’s no need to use complex shortcodes.
#2. How to add a sales Countdown to other pages (shop pages, category pages) on your site using the Storefront Blocks plugin
Now, let’s take a look at how you can add a sales countdown timer to other pages. Depending on your marketing strategy, this might include the main shop page or category pages on your site. We’ll show you how to do this using Storefront Blocks.
Get the Storefront Blocks plugin and install it on your WordPress website.
Once you’ve activated the plugin, you can create a new WooCommerce shop page and build your new shop page entirely using the Gutenberg editor. This way, you can design a page that’s truly unique to your store without having to mess around with complex shortcodes or CSS. You can use a variety of beautiful new blocks that come with Storefront Blocks including:
- Flip Book
- Product Card
- Masonry Product
- Square Grid Product
- Product List
- Sales Countdown
- Filter
- Single Product
- Category masonry
- Category square
- Standard WooCommerce
After you’ve built your new WooCommerce shop page, you can add a Sales Countdown block to it and customise it. You can customise the sales countdown timer however you like!
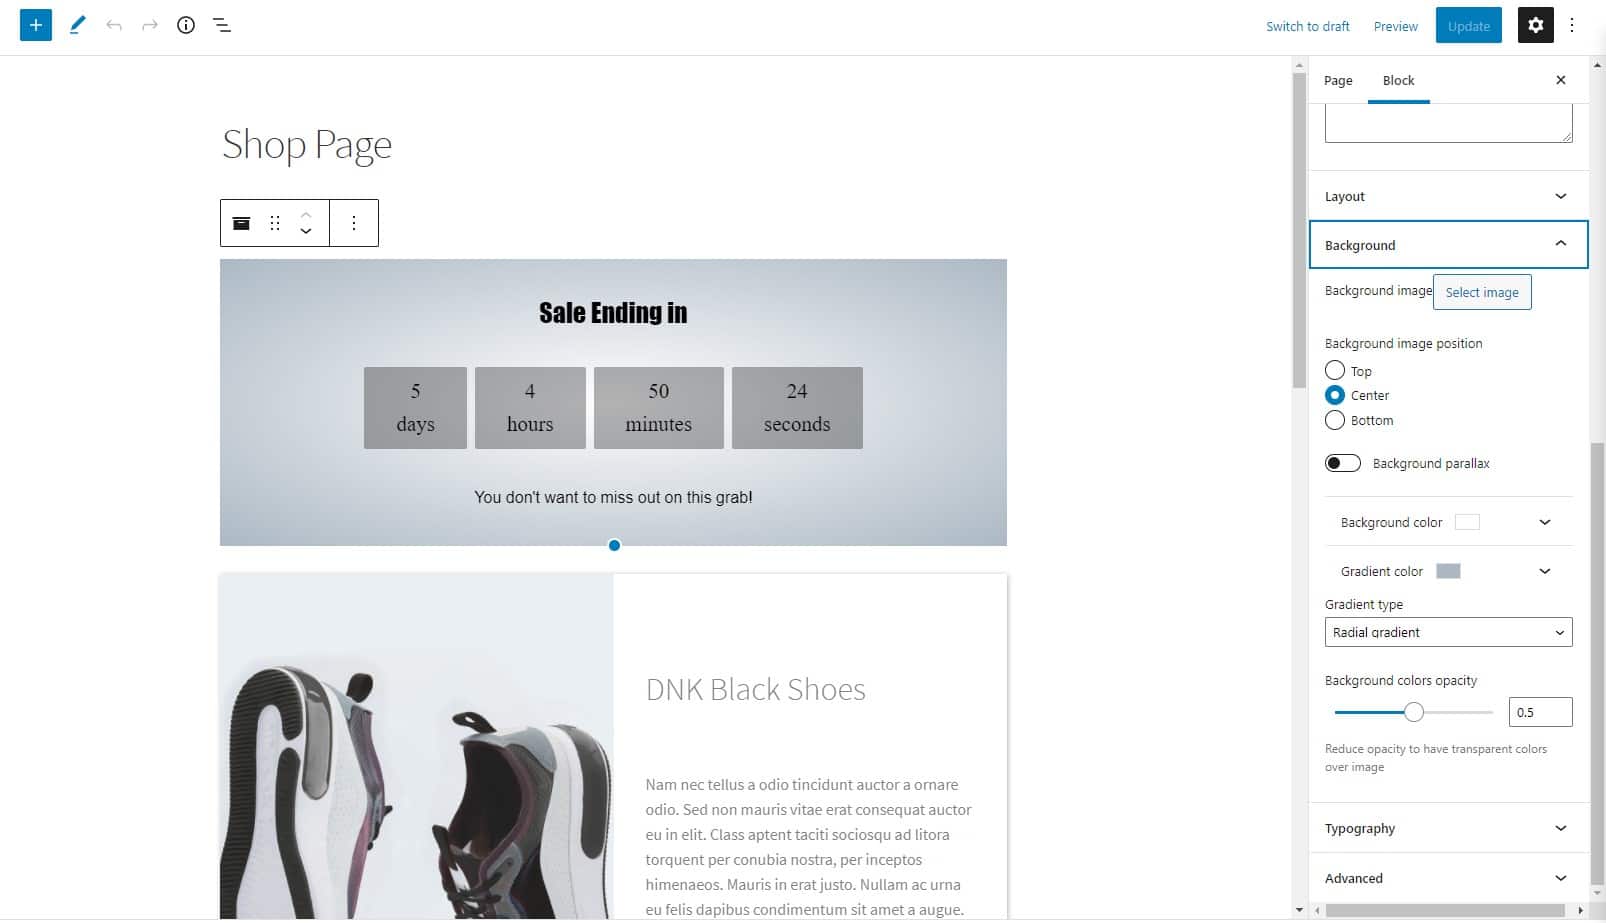
After you’re done customising your Sales Countdown block, set the new page you’ve created as your WooCommerce shop page.
To do this, head over to WooCommerce → Settings → Products → General from the WordPress dashboard. Set the Shop page field to your new shop page using the dropdown menu.
Adding Storefront blocks in more places
While the WooBuilder Blocks plugin only works on the WooCommerce single product page, you can use Storefront Blocks to add a sales countdown in more places on your site. Here are some examples for inspiration:
On Category Pages
You can display Storefront Blocks on WooCommerce category pages or under a category block on the main shop page for a single category sale.
On Blog Posts
You can also display a sales countdown timer to announce sales via blog posts. This is a great way to do effective content marketing and create a sense of urgency.
On Main Store Page
Storefront Blocks also allows users to display a sales countdown on the main shop page for a site-wide sale. If you want to create a sense of urgency for your whole site, you could try WooHoo Bar. This lets you add a countdown timer directly to your site’s header to increase visibility.
Conclusion
You can use a WooCommerce sales countdown timer to urge and encourage customers to purchase from you before the timer runs out. It’s a great way to increase sales and grow your bottom line.
You can use Storefront Blocks and WooBuilder Blocks to display a sales countdown timer anywhere on your e-commerce store. Depending on the types of products you want to sell, you could create a countdown timer for single product pages, the main shop page, or category pages. You can also add it to blog posts if you’d like!
We’ve shared some actionable tips on how to use a WooCommerce sales countdown timer to create urgency and drive more sales. Hopefully, you’re in a better position to take the next steps.
Ready to add a WooCommerce sales countdown timer to your store? Get the WooBuilder Blocks and Storefront Blocks countdown timer plugins today!
Leave a Reply