The notification bar and countdown timer plugin that boosts sales
✅ Fixed Countdown Timer ✅ Regular Countdown Timer ✅ Evergreen Countdown Timer
Read the quick start guide | See main features
$49 for 1 site, $75 for 5 sites, $99 for 25 sites
Lifetime licence also available for $199
How you might use WooHoo Bar
- Increase Product sales with special offers
- Create urgency for your new Product launch
- Improve communication for your e commerce offerings
- Build your marketing list e.g Mailchimp
Main features of WooHoo Bar
- 3 Sales Boosting Countdown Timers
- Fixed Countdown Timer – Set an end date and time.
- Regular Countdown Timer – The Countdown Timer automatically starts and stops daily
- Evergreen Countdown Timer – Each Visitor gets their own time limited campaign countdown
- Countdown Timer actions
- Option to hide the Notification Bar once the Countdown Timer finishes
- Complete design controland flexibility
- WooHoo Bar is built on the Gutenberg Block Editor so you get incredible levels of design options
- Change height of WooHoo Bars to increase visibility and clicks
- Use any 3rd Party Gutenberg Block in your notification bars. e.g Mailchimp or Navigation Block
- Sticky display options. Set notification bars to show at the top or bottom of your website
- WooCommerce integration
- Notification Bars can be used on individual WooCommerce Categories and Products
- Notification Bars can be used on specific WordPress Pages
- Great for landing pages or squeeze pages
- Mobile Friendly
- Notification Bars can be set to show on all devices, or just on desktop, or just on mobile
WooHoo Bar quick start guide
Step by Step Instructions
Step 1 – Add your first WooHoo Bar
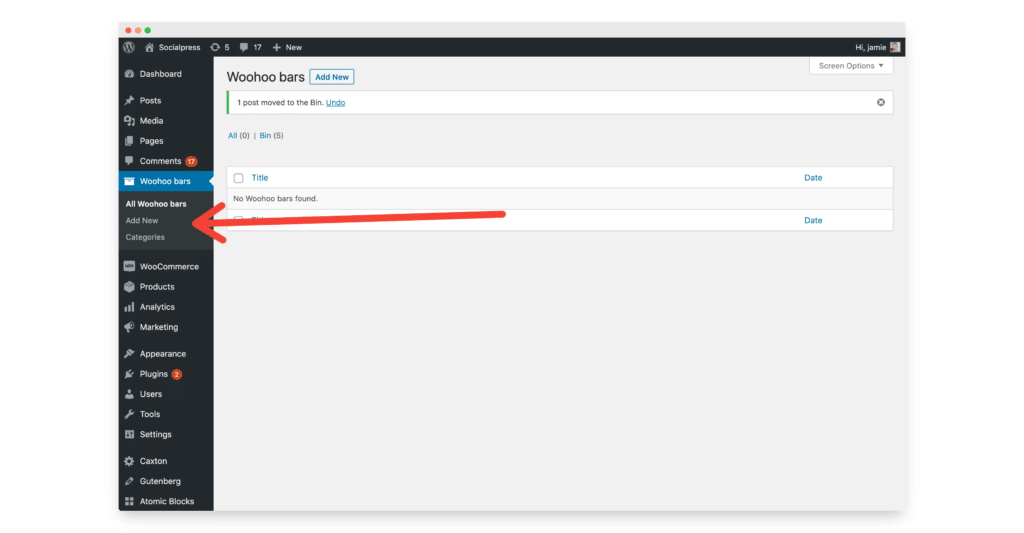
To add your first WooHoo Bar, go to your dashboard and click on WooHoo Bars.
Then click add new.
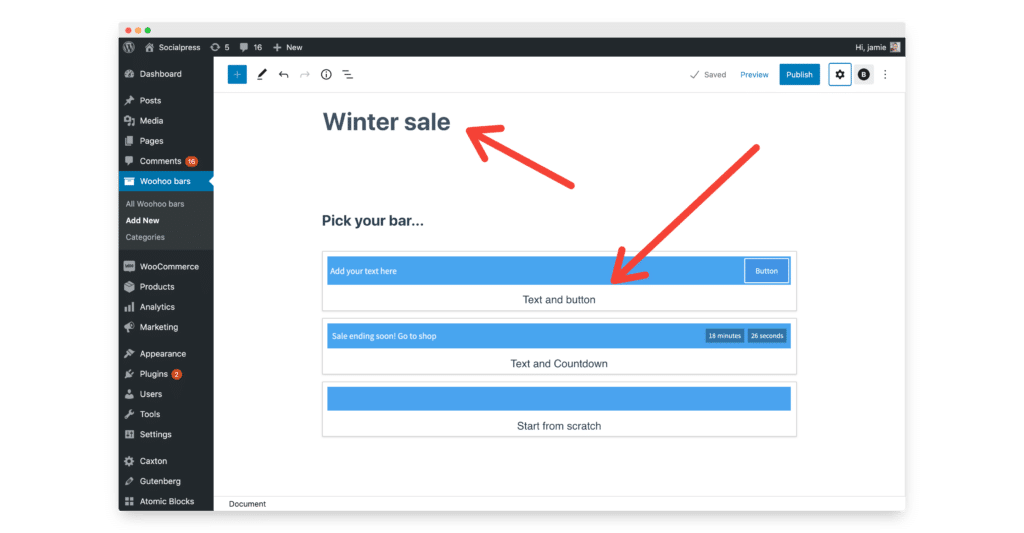
Step 2 – Add a title and then choose what type of WooHoo Bar you want to add
There are three WooHoo Bar types listed below.
- Text and button
- Text and countdown timer
- Start from scratch (add any Gutenberg block into the bar)
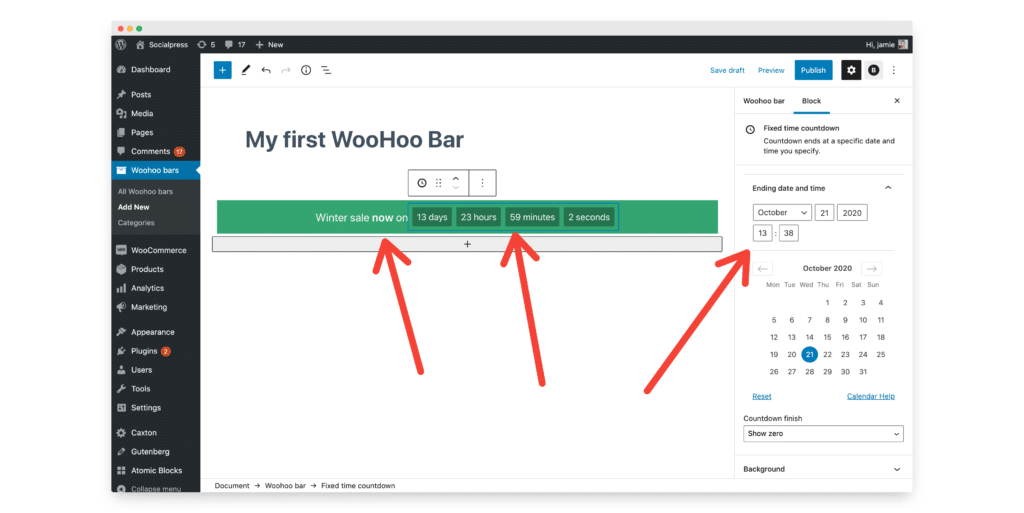
Step 3 – Add your text and then choose end time for your timer
The Fixed Timer will be selected by default. This can be changed by clicking on the block transform icon (more details below)
Step 4 – Change the Countdown Timer Type (if necessary)
If you want to change the Countdown Timer type click on the WooHoo Bar Block and then click on the Block Transform Icon (see video below)
There are three Countdown timers to choose from
- Fixed Countdown Timer – counts down to a date and time in the future
- Regular Countdown Timer – counts down to the same time every day (then restarts)
- Ever Green Countdown Timer – count down starts for each visitor when the land on the website. So each visitor has a personalised count down.
How to change the Countdown Timer Type
Step 5 – Customize the design of WooHoo Bar
There are lots and lots of customization options.
- Change bar colour (including gradients)
- Change bar height
- Add a background image to the bar
- Change font type, size and color
- Change countdown timer font, size and colour
- Set to centre or justify the content
- And much more 🙂
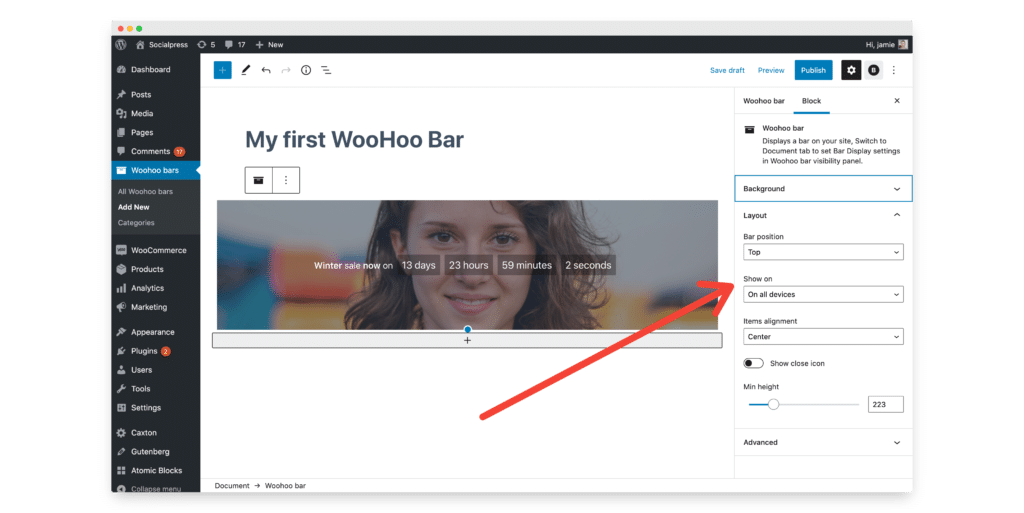
Step 6 – Set the bar to show at the top or bottom of your website and whether to show on mobile
Click on Layout in the right hand customizer to see the options listed below
- Set bar to show at the top
- Set bar to show fixed to the top
- Set bar to show at the bottom
- Set bar to show fixed to the bottom
- Set bar to show on desktop, mobile or both
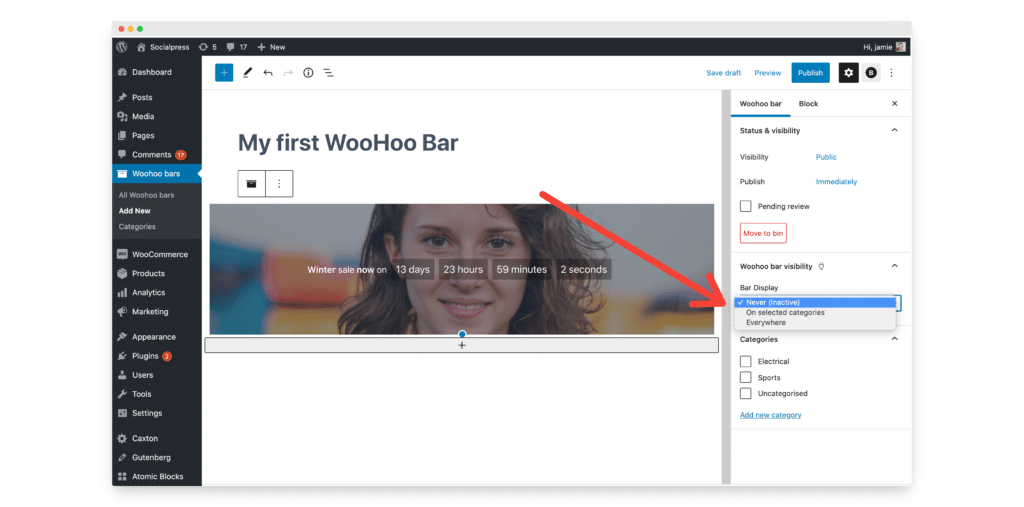
Step 7- Set conditions for where to show the bar
Visibility Options include
- Never (inactive) – the bar won’t show on the website – this is the default setting
- Everywhere – the bar will show on the whole website
- On Selected Categories – the bar will only show on specific WooCommerce Categories (if ticked)
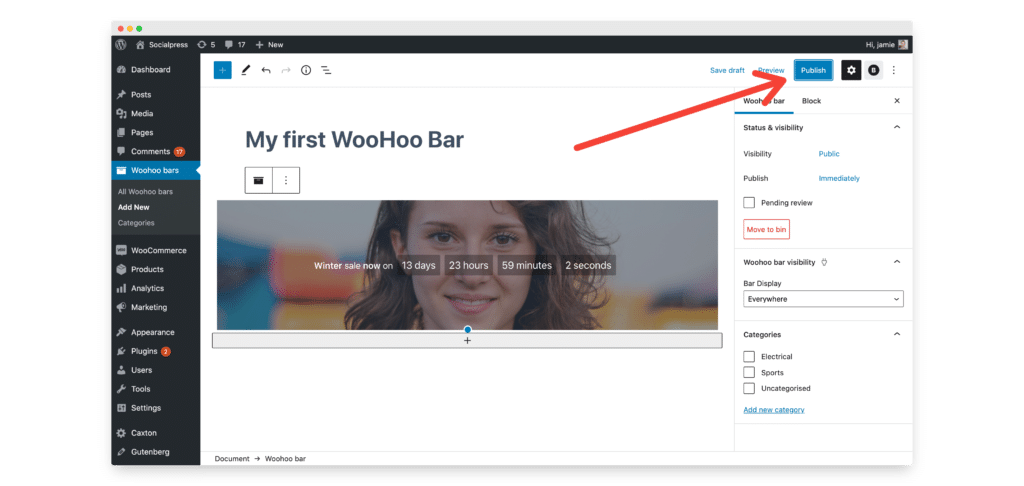
Step 8 – Publish the WooHoo Bar
Step 9 – How to add a WooHoo Bar to a specific page (E.G a landing page)
To add a WooHoo Bar to a specific page, just go to the page you want it to show on and add the WooHoo Bar block to that page 😉